How to set up SMTP in Mailrelay by starting the free trial
Mailrelay's SMTP server lets you send transactional emails, or send your campaigns from your own software, through Mailrelay's infrastructure. SMTP sending is part of the SMTP + API add-on package, which you can try free for 30 days. This guide walks you through activating the trial and enabling SMTP on your account.
1 Open SMTP settings and start the free trial
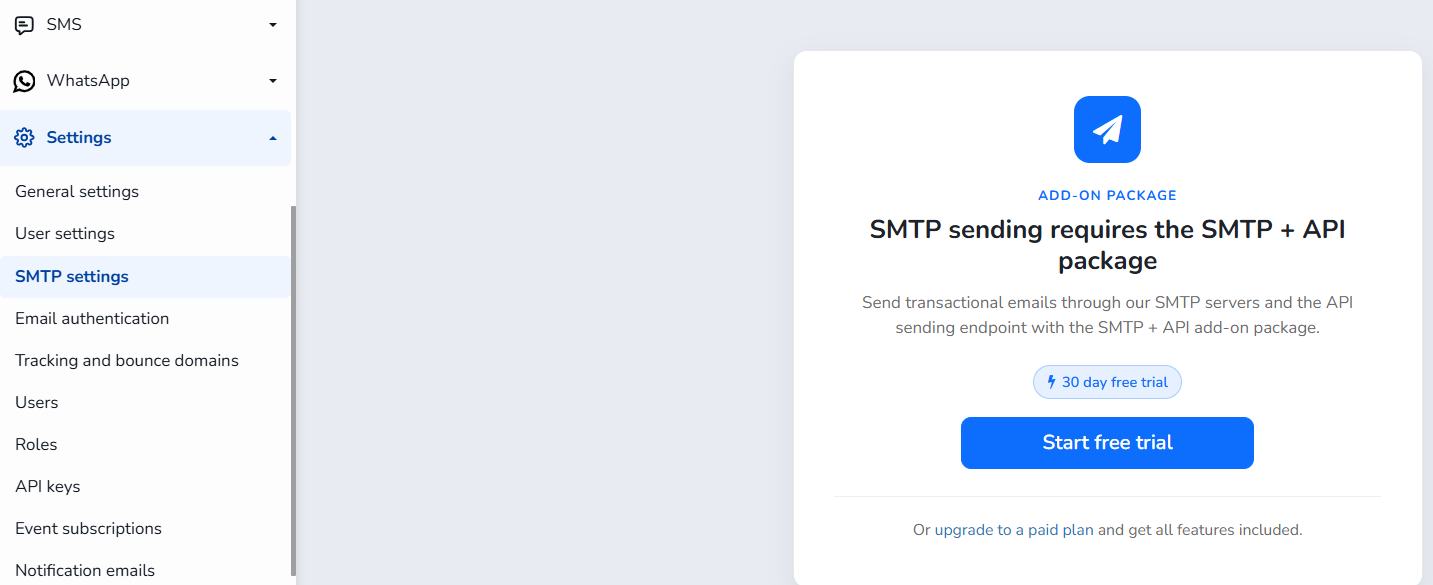
In the left-hand menu, go to Settings → SMTP settings. If your account does not include the SMTP + API package yet, you will see the message “SMTP sending requires the SMTP + API package”.
Click Start free trial to activate a 30-day free trial of the package. Alternatively, you can use the upgrade to a paid plan link to get all features included.
2 Review the SMTP terms
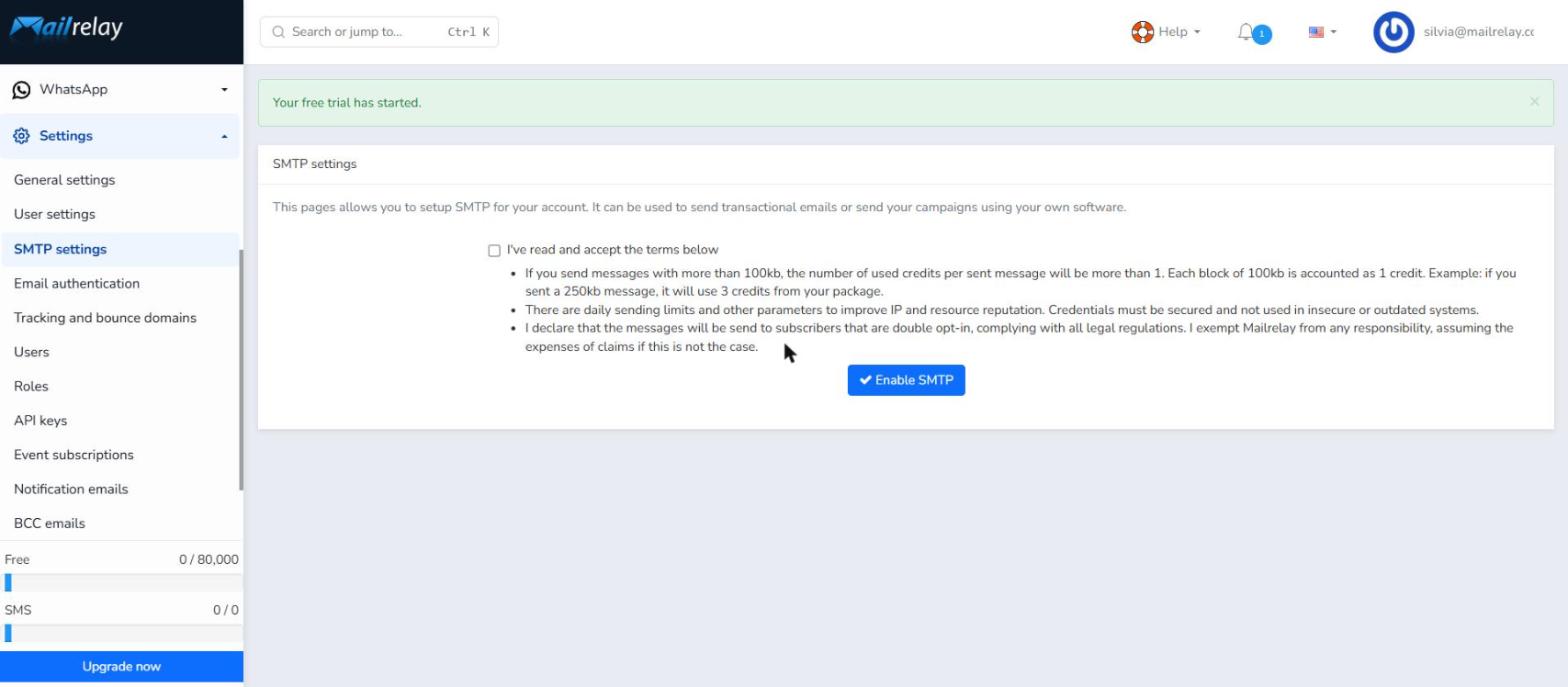
Once the trial is active, a green banner confirms “Your free trial has started.” and the SMTP settings page shows the terms of use you need to accept before SMTP can be enabled:
- Message size and credits: messages larger than 100 KB use more than one credit. Each 100 KB block counts as 1 credit (for example, a 250 KB message uses 3 credits).
- Sending limits and security: there are daily sending limits and other parameters to protect IP and resource reputation. Your credentials must be kept secure and must not be used in insecure or outdated systems.
- Consent: you declare that messages will be sent to double opt-in subscribers, in compliance with all legal regulations.
3 Accept the terms and enable SMTP
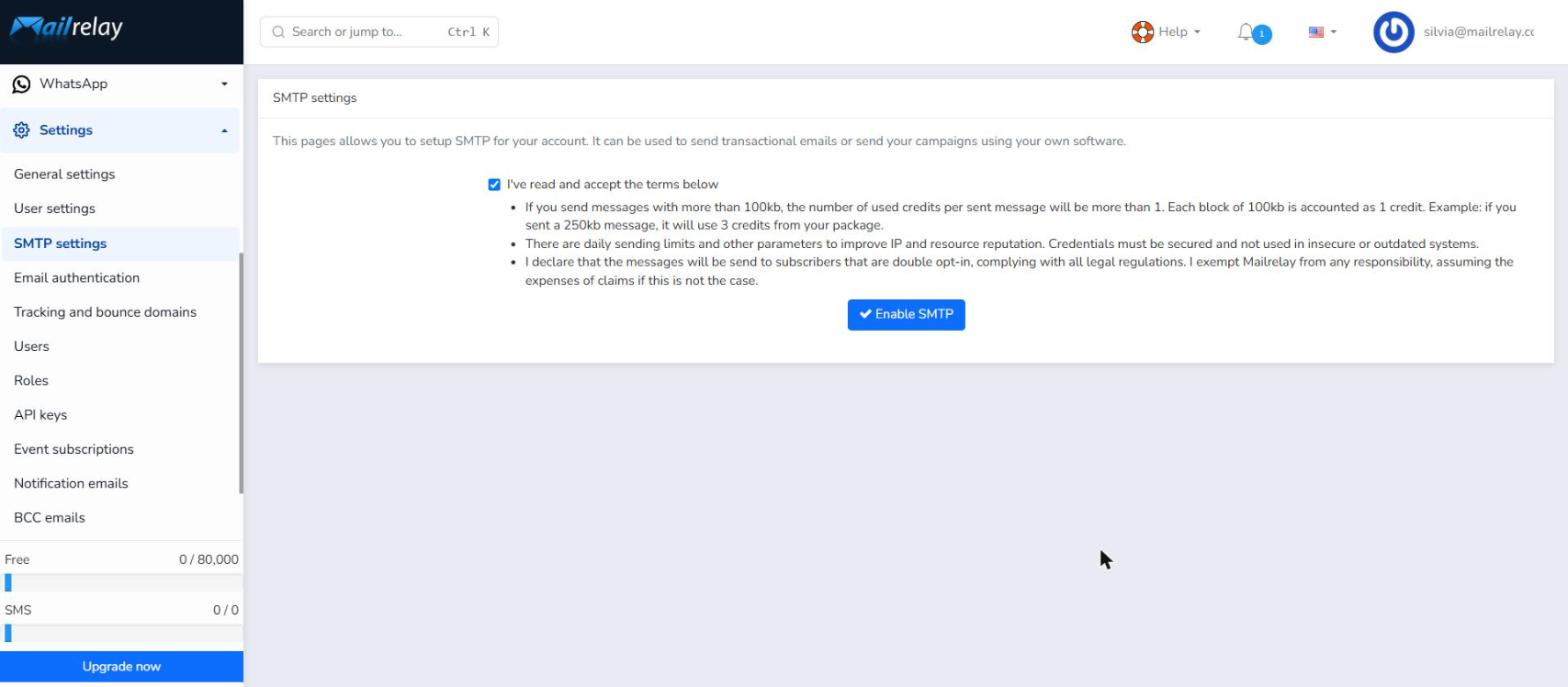
Tick I've read and accept the terms below and click Enable SMTP.
4 Copy your SMTP credentials
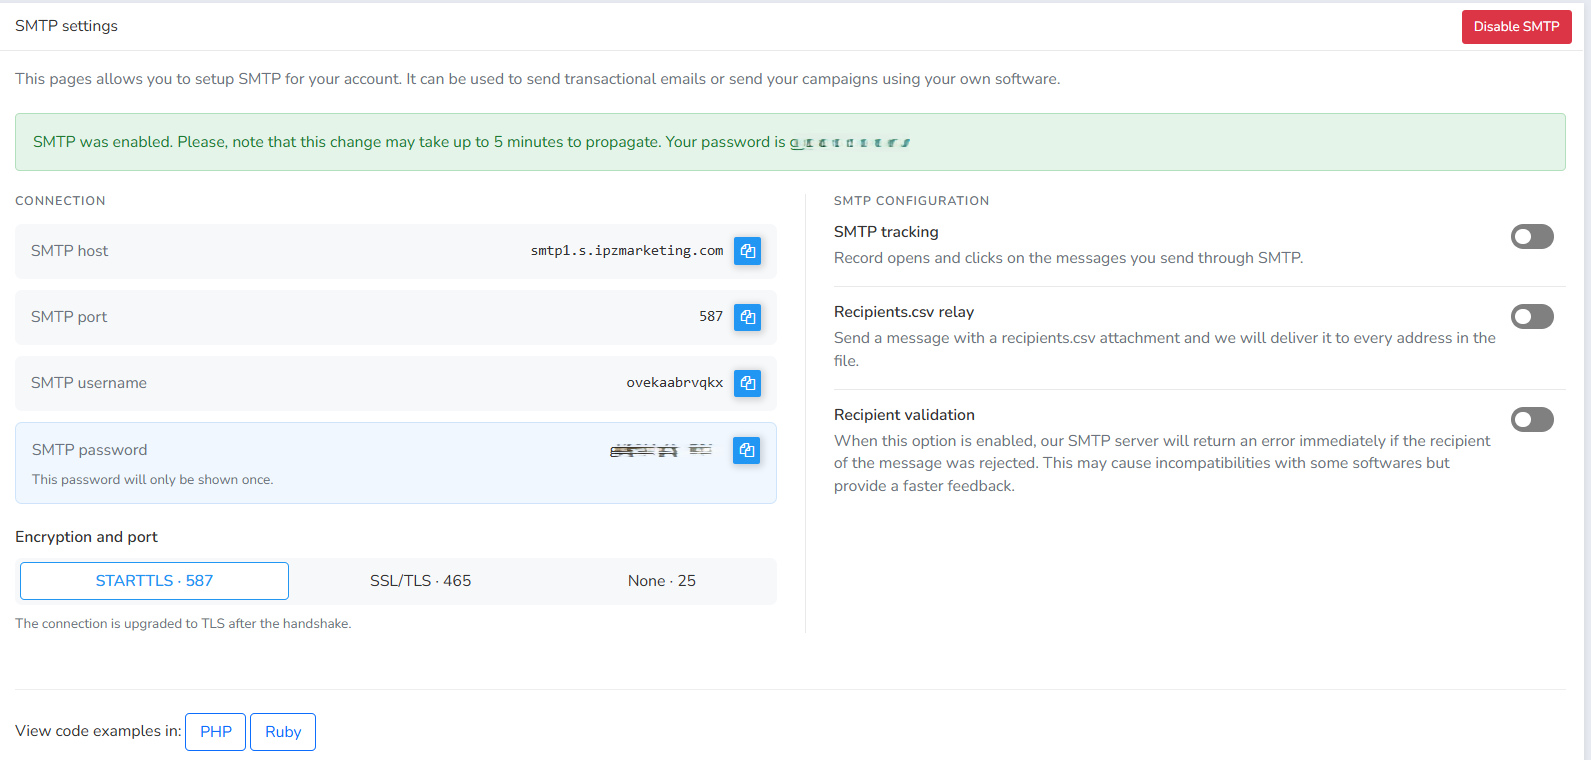
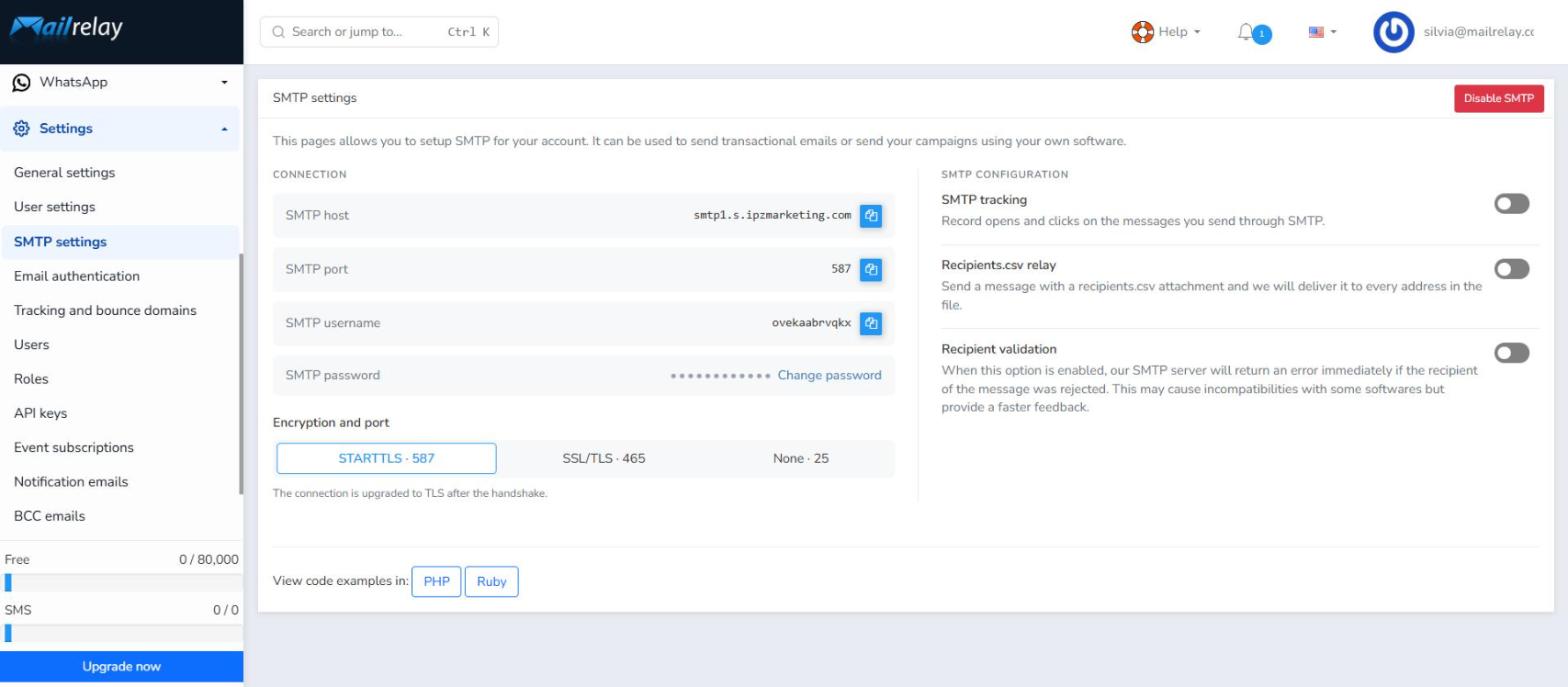
SMTP is now enabled. A confirmation message indicates that the change may take up to 5 minutes to propagate, and your connection details are displayed:
| Field | Value |
|---|---|
| SMTP host | smtp1.s.ipzmarketing.com |
| SMTP port | 587 (default) |
| SMTP username | Unique username generated for your account |
| SMTP password | Generated password — shown only once |
Use the blue copy button next to each value to copy it to your clipboard.
5 Choose encryption and configure SMTP options
When you come back to SMTP settings, the password is hidden and a Change password link is available. From this panel you can also:
Encryption and port
- STARTTLS · 587 (recommended) — the connection is upgraded to TLS after the handshake.
- SSL/TLS · 465 — encrypted connection from the start.
- None · 25 — unencrypted connection.
SMTP configuration
- SMTP tracking: records opens and clicks on the messages you send through SMTP.
- Recipients.csv relay: send a message with a
recipients.csvattachment and Mailrelay delivers it to every address in the file. - Recipient validation: the SMTP server returns an error immediately if the recipient is rejected. This gives faster feedback but may cause incompatibilities with some software.
To disable SMTP at any time, click the red Disable SMTP button at the top right.
6 Use the code examples (optional)
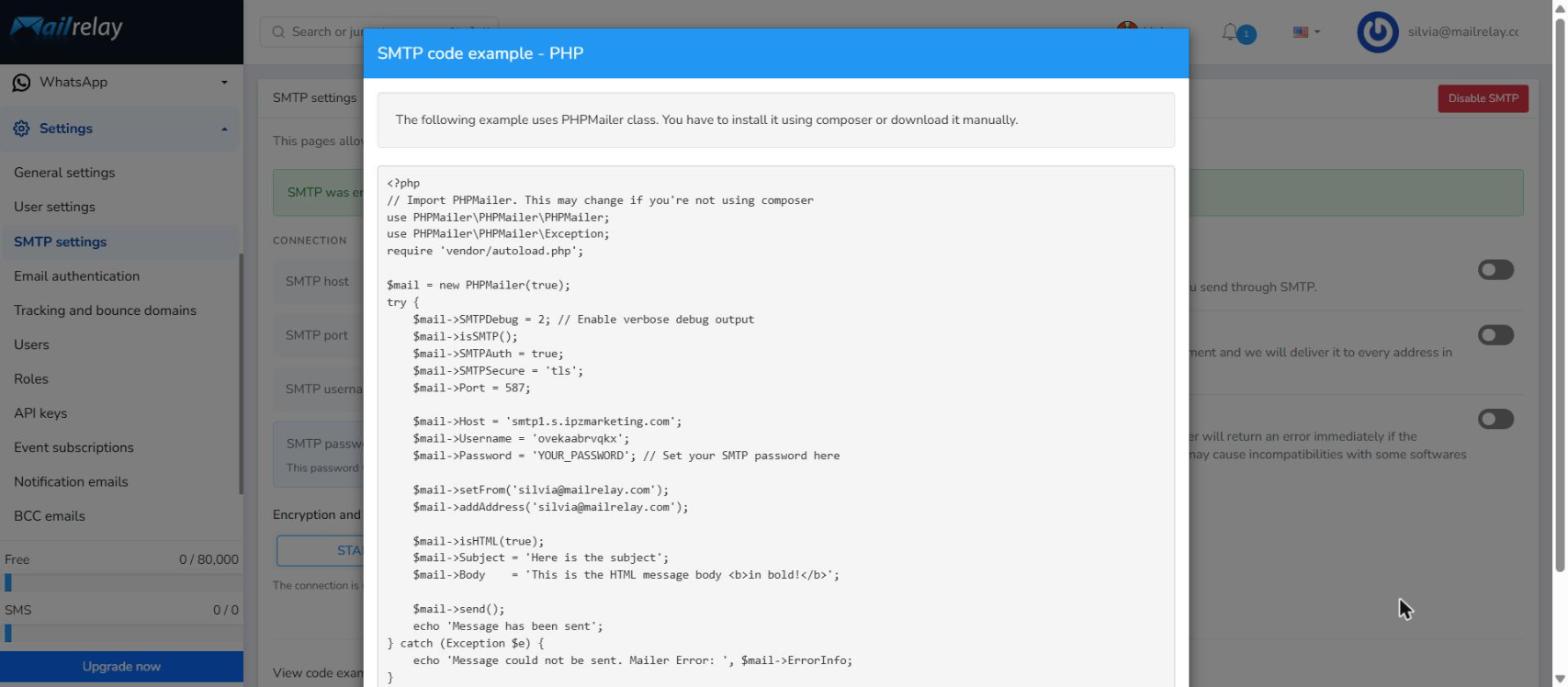
At the bottom of the page, under View code examples in, click PHP or Ruby to open a ready-to-use example pre-filled with your host, port and username. The PHP example uses the PHPMailer class, which you can install with Composer or download manually. Just replace YOUR_PASSWORD with your SMTP password.
Summary
- Go to Settings → SMTP settings and click Start free trial (30 days).
- Accept the SMTP terms and click Enable SMTP.
- Copy your host, port, username and password (the password is shown only once).
- Choose the encryption/port and enable the optional SMTP features you need.
- Allow up to 5 minutes for the change to propagate before sending.
Was this article helpful?
That’s Great!
Thank you for your feedback
Sorry! We couldn't be helpful
Thank you for your feedback
Feedback sent
We appreciate your effort and will try to fix the article