Billing
Step-by-step guide to purchasing an email plan, an SMS plan, or an add-on
This guide explains how to purchase an email plan, an SMS plan, or one of our add-ons (WhatsApp or SMTP) in Mailrelay, from accessing the billing section through to confirming payment.
We will also cover the other features included in the Billing menu, such as downloading invoices, bringing forward renewal dates, or canceling credit bundles.
1 - Purchasing a Plan
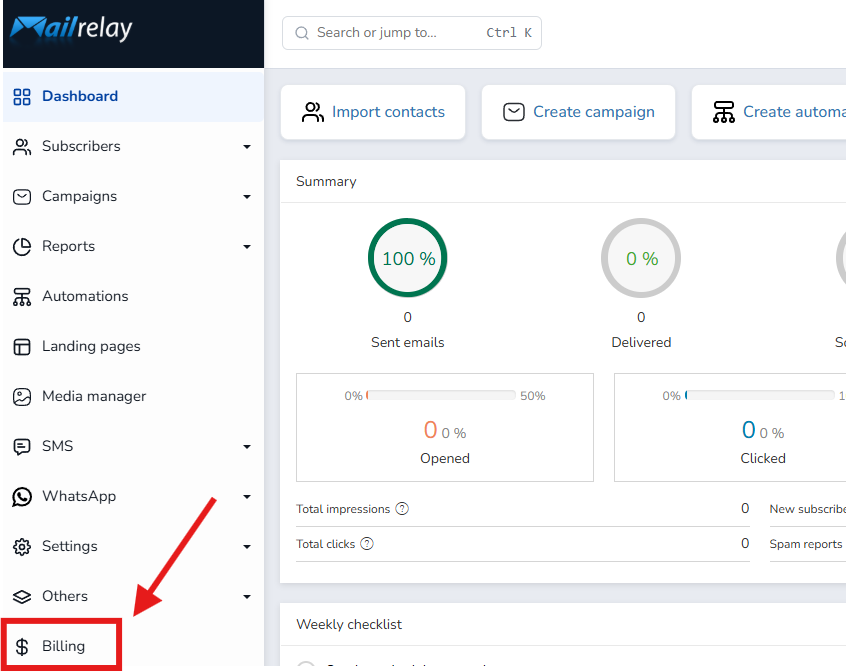
Step 1. Access the Billing Section
To purchase any plan or add-on, go to the vertical menu on the left side of the panel and select the “Billing” option.
Step 2. Choose the Type of Plan
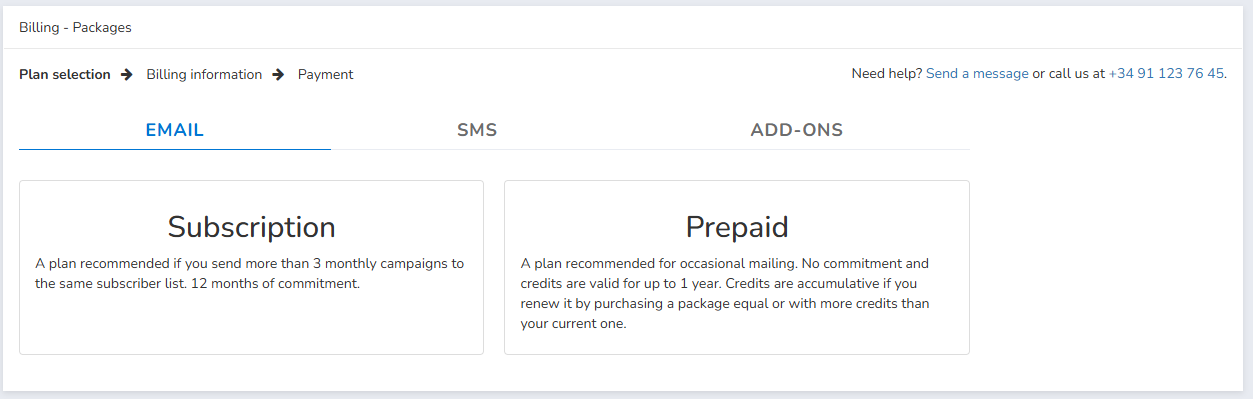
A new screen will appear where you can choose to purchase an Email plan, an SMS plan, or an Add-on (WhatsApp or SMTP).
Step 3. Configure the Plan
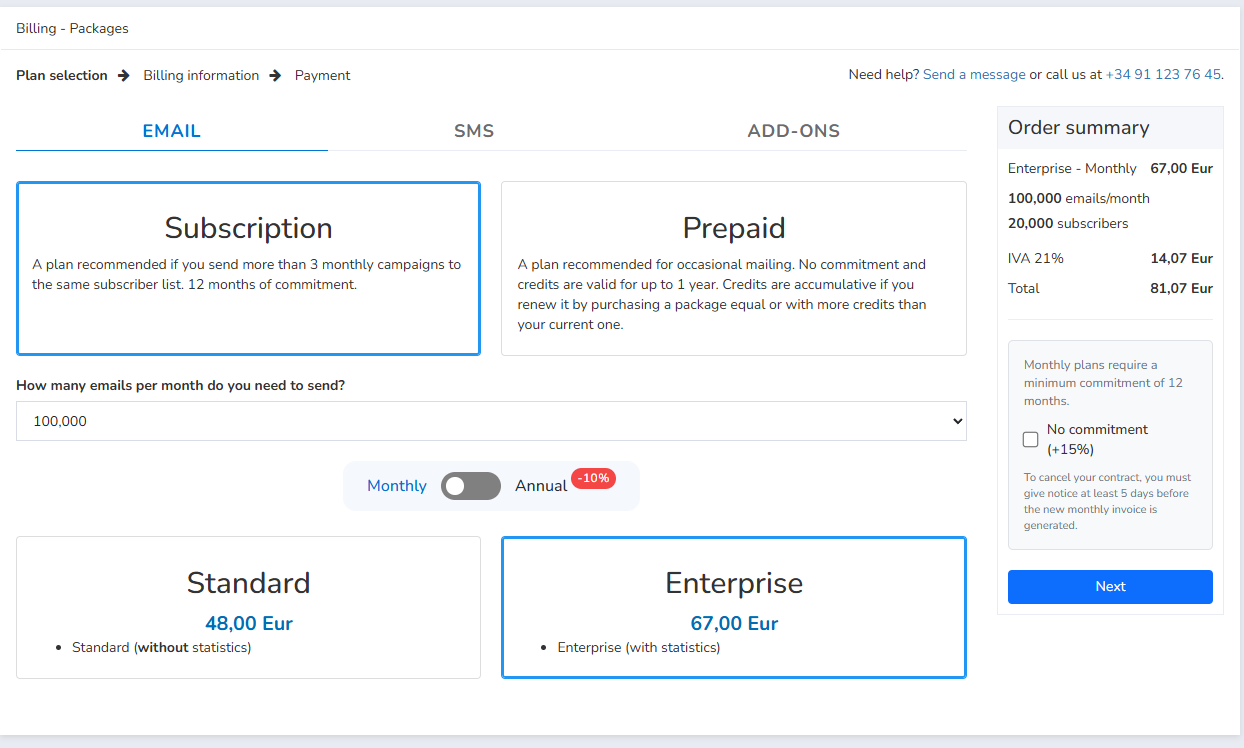
Continuing with the example of an Email plan, two purchase options will appear:
• Subscription: recommended plan if you regularly send emails to the same subscriber list. By default, the monthly plan has a 12-month minimum commitment. It can also be purchased with no commitment, at a 15% surcharge.
• Prepaid: credit bundle recommended for occasional sends, with no commitment period and a validity of 1 year. Unused sends can be carried over when you renew the bundle for one of equal or greater value than the one originally purchased.
If you choose the subscription, you will also need to specify the number of monthly sends you need, the payment method (monthly or annual), whether you want a commitment period or not, and the plan version: Standard (without advanced statistics) or Enterprise (with advanced statistics).
Once you have selected all the options, click “Next”.
Step 4. Complete the Billing Details
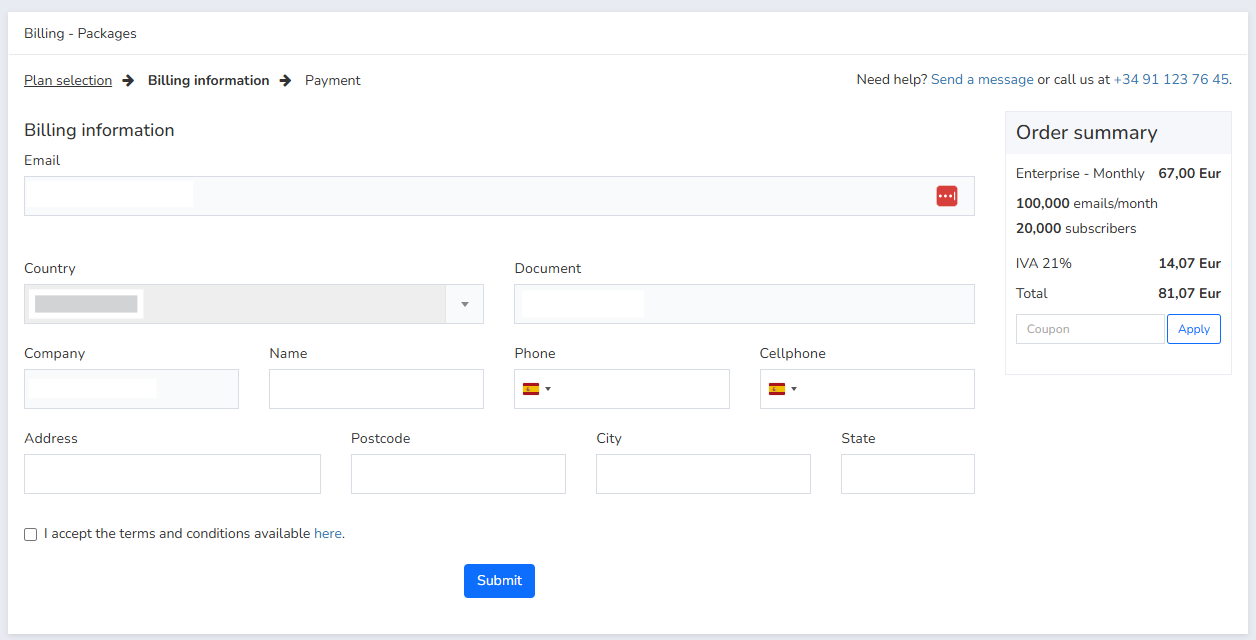
Next, you will be asked for the information needed to generate the billing record:
• Email: billing email address, where you will receive your invoices and through which Mailrelay may contact you.
• Country: the country where your company is located.
• Tax ID (NIF/CIF/VAT): the number your country's tax authority uses to identify you or your company (for example: NIF/CIF in Spain, VAT number in the EU, EIN in the USA, RFC in Mexico, CUIT in Argentina, RUT in Chile, NIT in Colombia, etc.)
• Company: your company's name.
• Name: the name of the contact person.
• Phone / Mobile Phone: contact number.
• Address: the full address where your business operates.
After completing the form, check the box to accept the terms of use and click the “Submit” button.
Step 5. Make the Payment
The next screen will take you to the payment gateway, where you can choose to pay by Card or PayPal. When you click “Pay”, you will be redirected to the relevant platform to enter your details and complete the purchase.
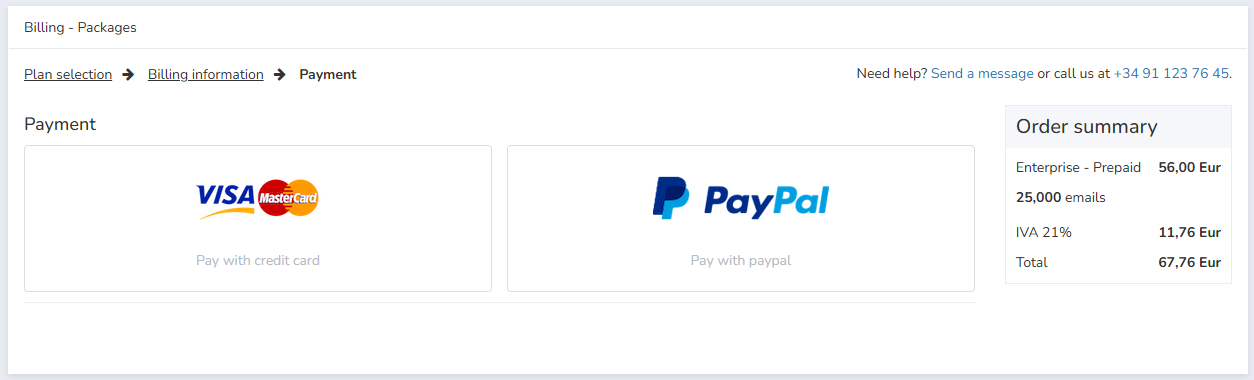
Once payment is confirmed, the purchased plan will become active on your Mailrelay account.
2 - Invoices Menu
The second option in the Billing menu is the “Invoices” button.
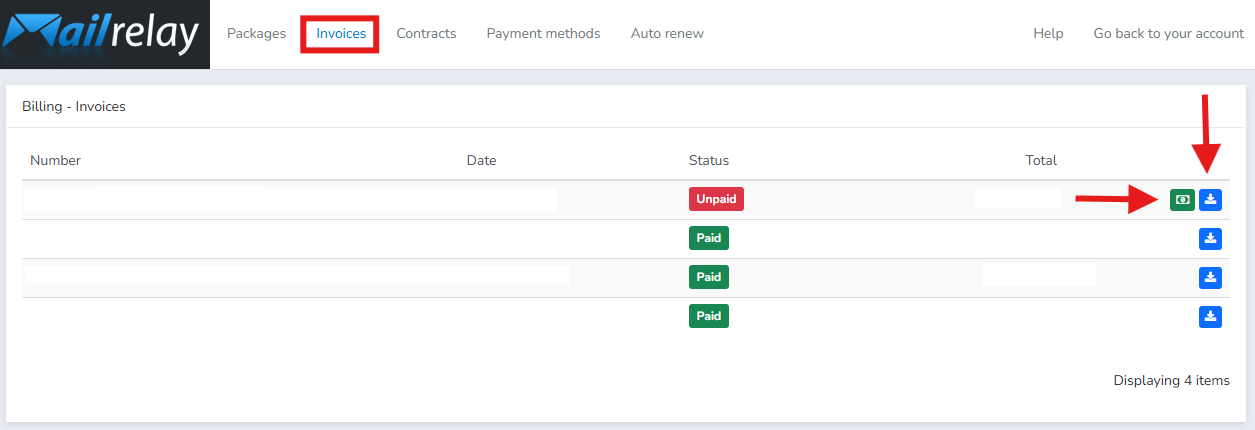
This screen displays a record of all the invoices created for your account, the creation date, their status (Paid / Unpaid), and the total amount of each invoice.
In the last column you will find two icons that let you pay the invoice (green icon) and download it (blue icon).
3 - Contracts Menu
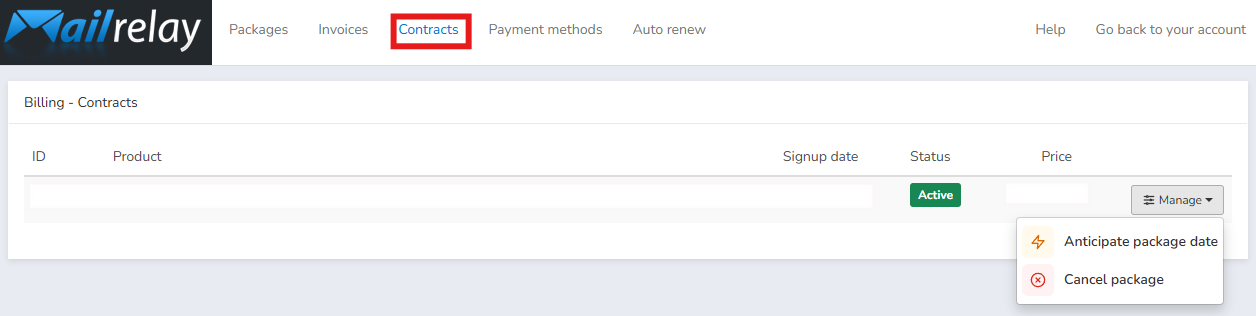
The third option in the Billing menu is the “Contracts” button. On this screen you can view the contracts you have had, their status (Active / Canceled), the registration date, and their amount.
You will find different options depending on the product you have purchased: a Subscription plan, a Prepaid or SMS bundle, or an add-on.
If you have a Subscription plan, you will see the options “Bring forward package renewal dates” and, only if your Subscription has no commitment period, “Cancel package”.
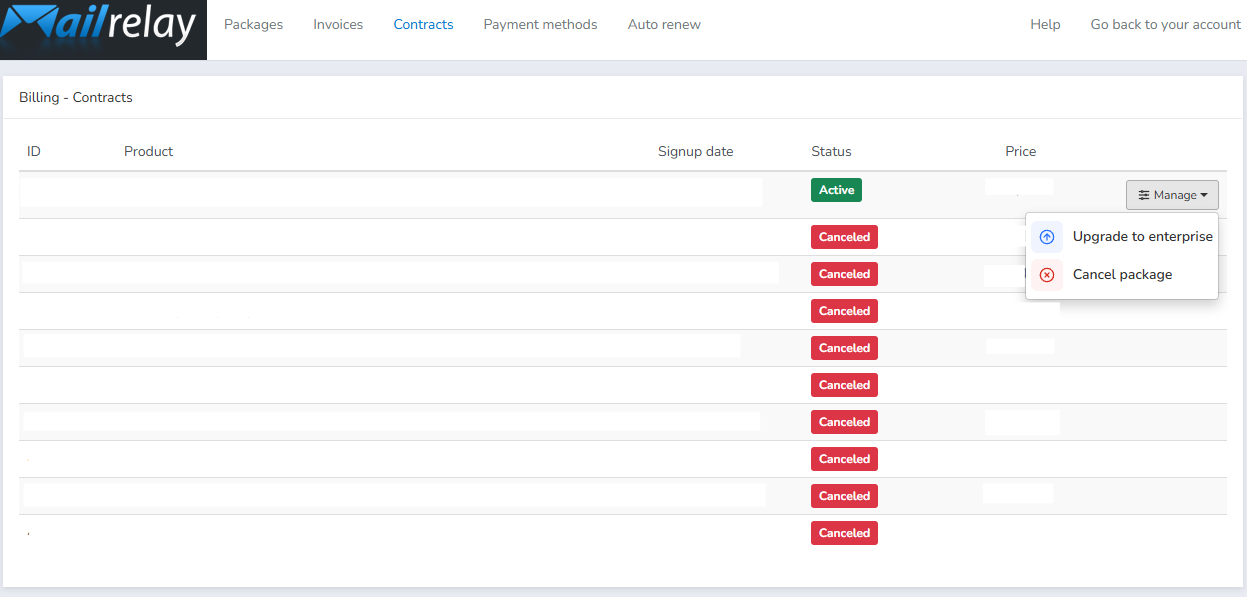
If you have a Prepaid or SMS bundle, the options will be different: the “Cancel package” option remains, and, only if the plan purchased is Standard, the option “Upgrade plan to Enterprise version” will also appear.
4 - Payment Methods Menu
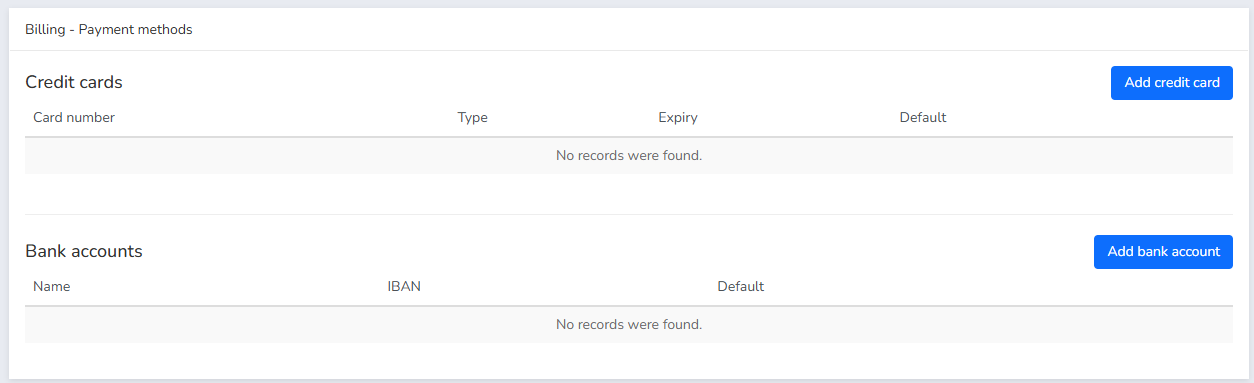
The fourth option in the Billing menu is the “Payment Methods” button.
In this menu you can add credit cards so that charges are made automatically to that card, or add an account number so that charges are made to that bank account.
5 - Automatic Renewal Menu
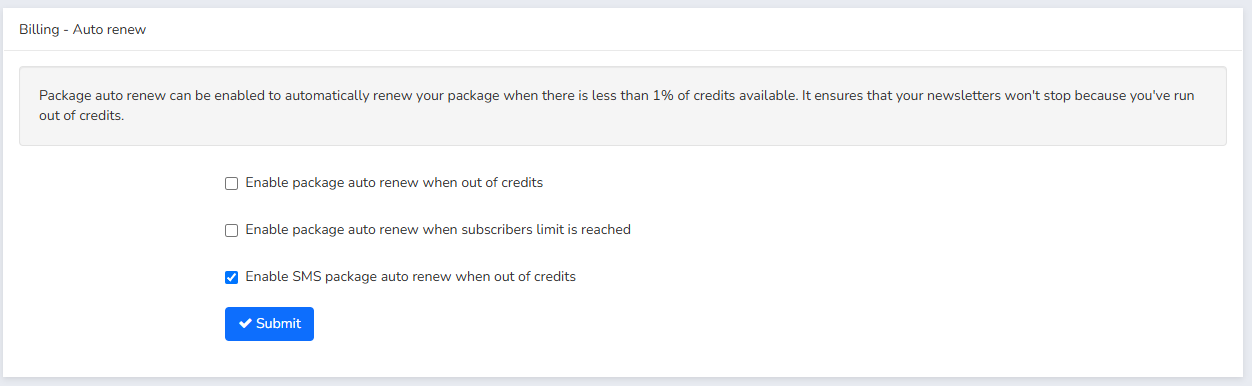
The last option in the Billing menu is “Automatic Renewal”.
Here you can enable automatic renewal for cases where you run out of credits or reach the plan's subscriber limit. If you select either of these options, the dates will be brought forward for the monthly plan, or a new prepaid bundle will be added for the prepaid option, and a new invoice will be generated as soon as either condition is met. Once the invoice is paid, the credits will become available.
Was this article helpful?
That’s Great!
Thank you for your feedback
Sorry! We couldn't be helpful
Thank you for your feedback
Feedback sent
We appreciate your effort and will try to fix the article