Import Whatsapp Subscribers
Importing a list of subscribers for sending WhatsApp messages is very simple. The way to do it is practically the same as importing subscribers for SMS, let's take a look.
1.- Prepare the document to import
The first step is to create a .csv file with Excel, Numbers, or any other spreadsheet application, where we will place the list of subscribers and the fields we want to add to the import.
The process is always the same: create as many columns as fields you want to import, keeping in mind that one of those columns must be the WhatsApp phone number. After that, simply export the document as .csv and it will be ready to use in Mailrelay.
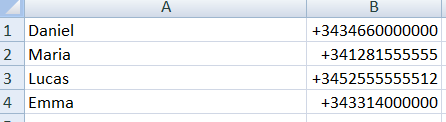
It is important to import it with the correct format so that its content is detected without issues. Any mobile phone number generally follows this pattern:
| Country code + area or zone code + phone number |
Let's look at a few examples:
- Spain: +34600000000 (in Spain there is no area code, so it would only include the country code, made up of +34, and the phone number, made up of 9 digits).
- USA: +14080000000
- Mexico: +525500000000
2.- Import WhatsApp subscribers
Once you have your CSV file, log in to your Mailrelay account and go to Subscribers >> Imports >> New import.
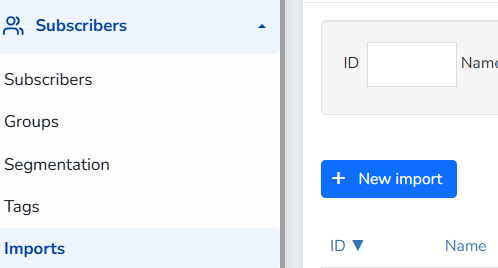
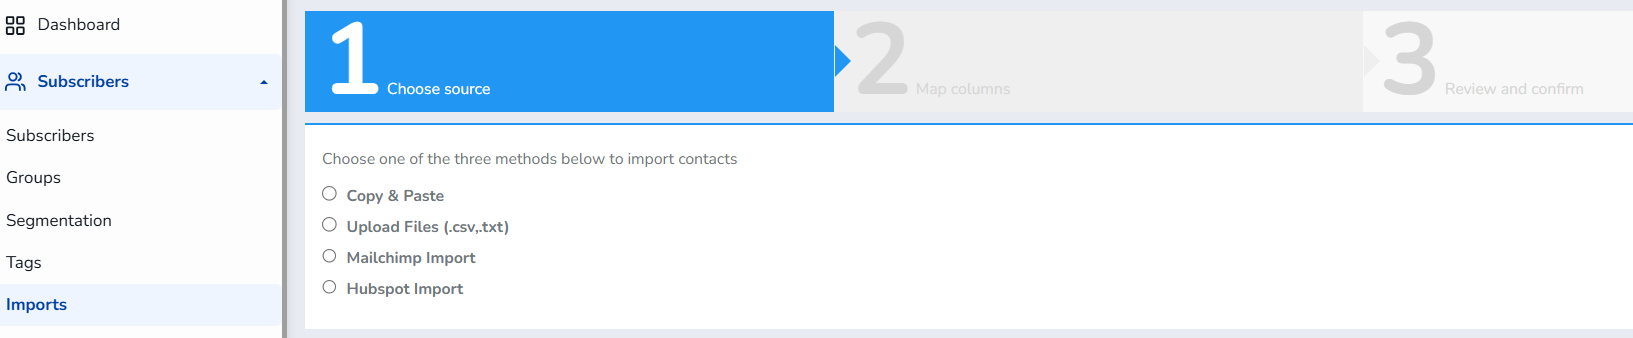
When you click the New import button, you will be taken to a new screen where 4 types of imports are presented:
- Copy and paste
- Upload files (.csv, .txt)
- Import from Mailchimp
- Hubspot impor
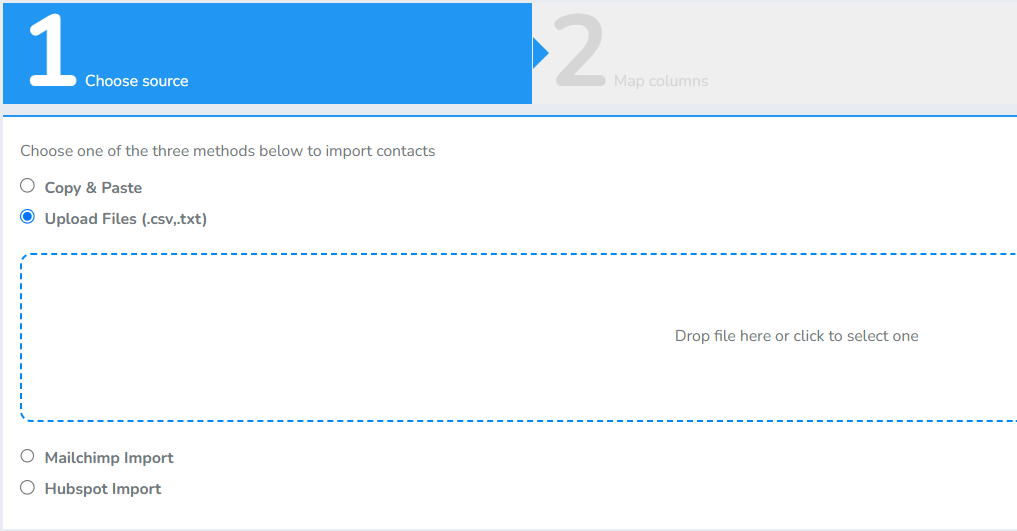
2.1.- Upload files (.csv, .txt)
We will use the most common and typical option for this guide, which is none other than Upload files (.csv, .txt). Click on it and an area will appear where you must drag the .csv file (Drag the file or click here to select it) containing the data of the customers you want to contact via WhatsApp.
This will take you to a new window where the system, once it has processed the information from your .csv, assigns each of the detected values to a specific field. Check that the data in the Field column matches the content of the fields in the .csv file (especially that the phone number from your .csv corresponds to WhatsApp phone). If not, click the dropdown menu in the Field column to select it.
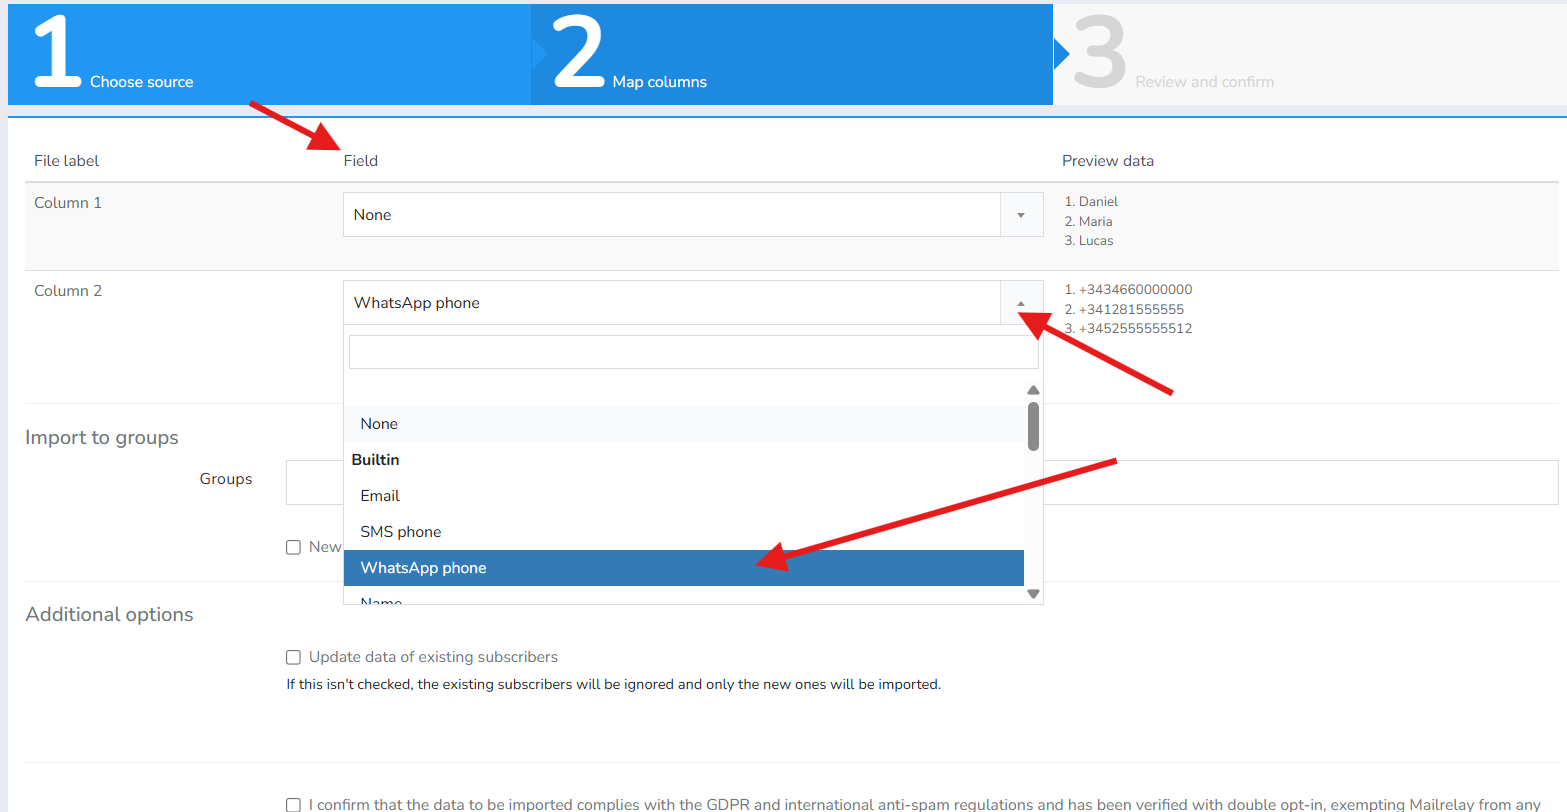
With everything correct, it's time to specify the group to import them into. To do this, select the desired group in the Groups option within the Import into groups area, and if you forgot to create the group, that's fine, since you can create it right at the time of import by checking the New group box.
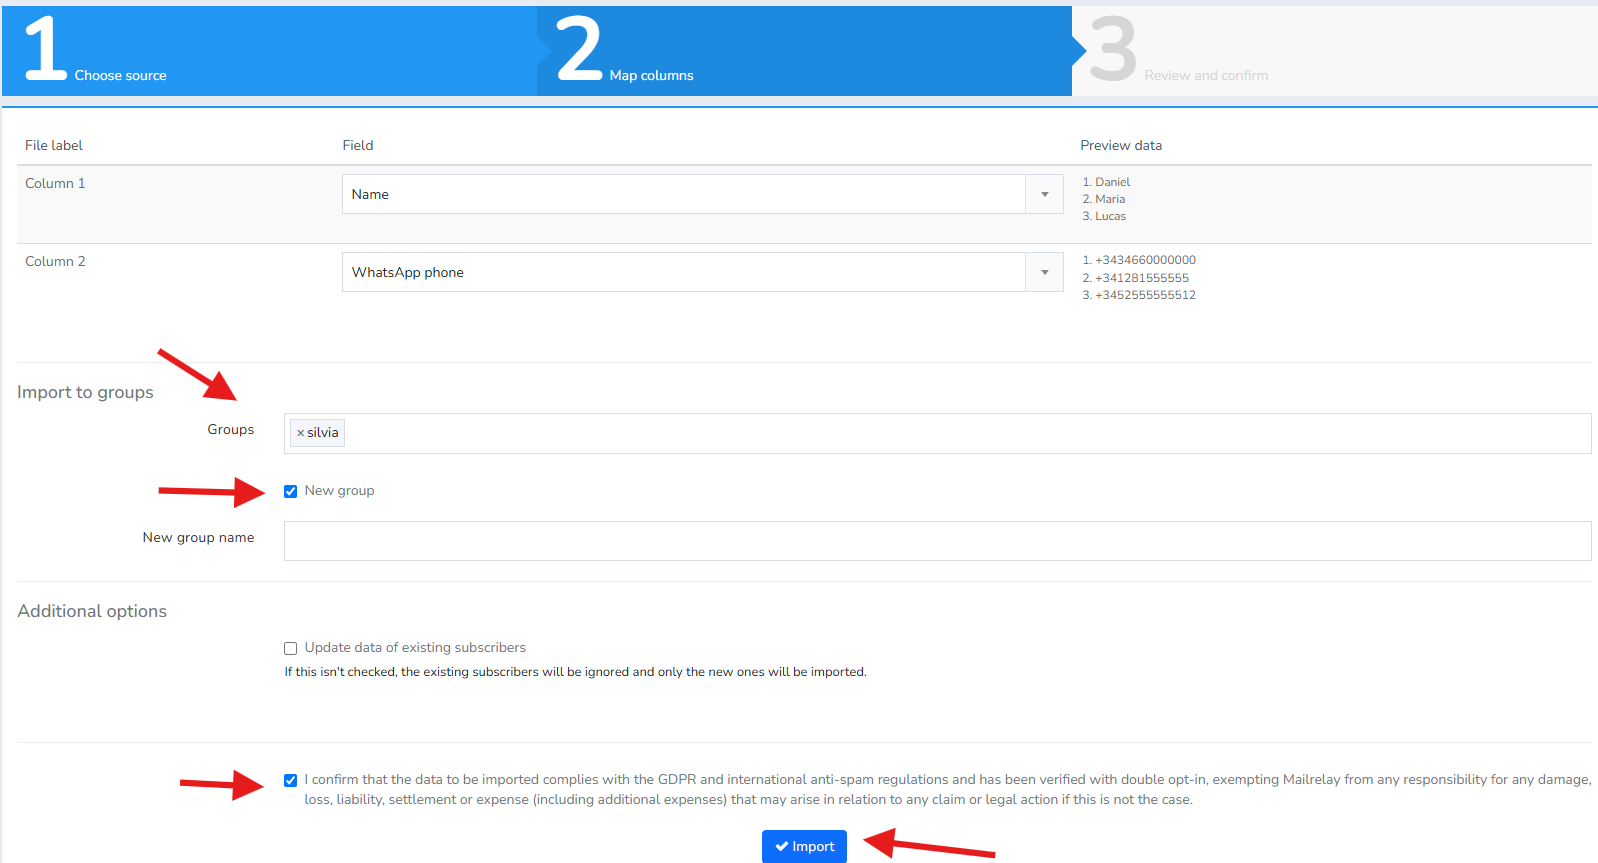
Finally, check the box "I declare that the data to be imported complies with the GDPR (if applicable to my account) and international anti-spam regulations, and has been verified with double opt-in...", and click the Import button to complete the import.
IMPORTANT: With these default options, if a subscriber already exists in the chosen group, the existing subscriber will be ignored and will not be imported, nor will their information be updated.
There are several options to customize the system's behavior with already existing contacts, which you can find in the Additional options area.
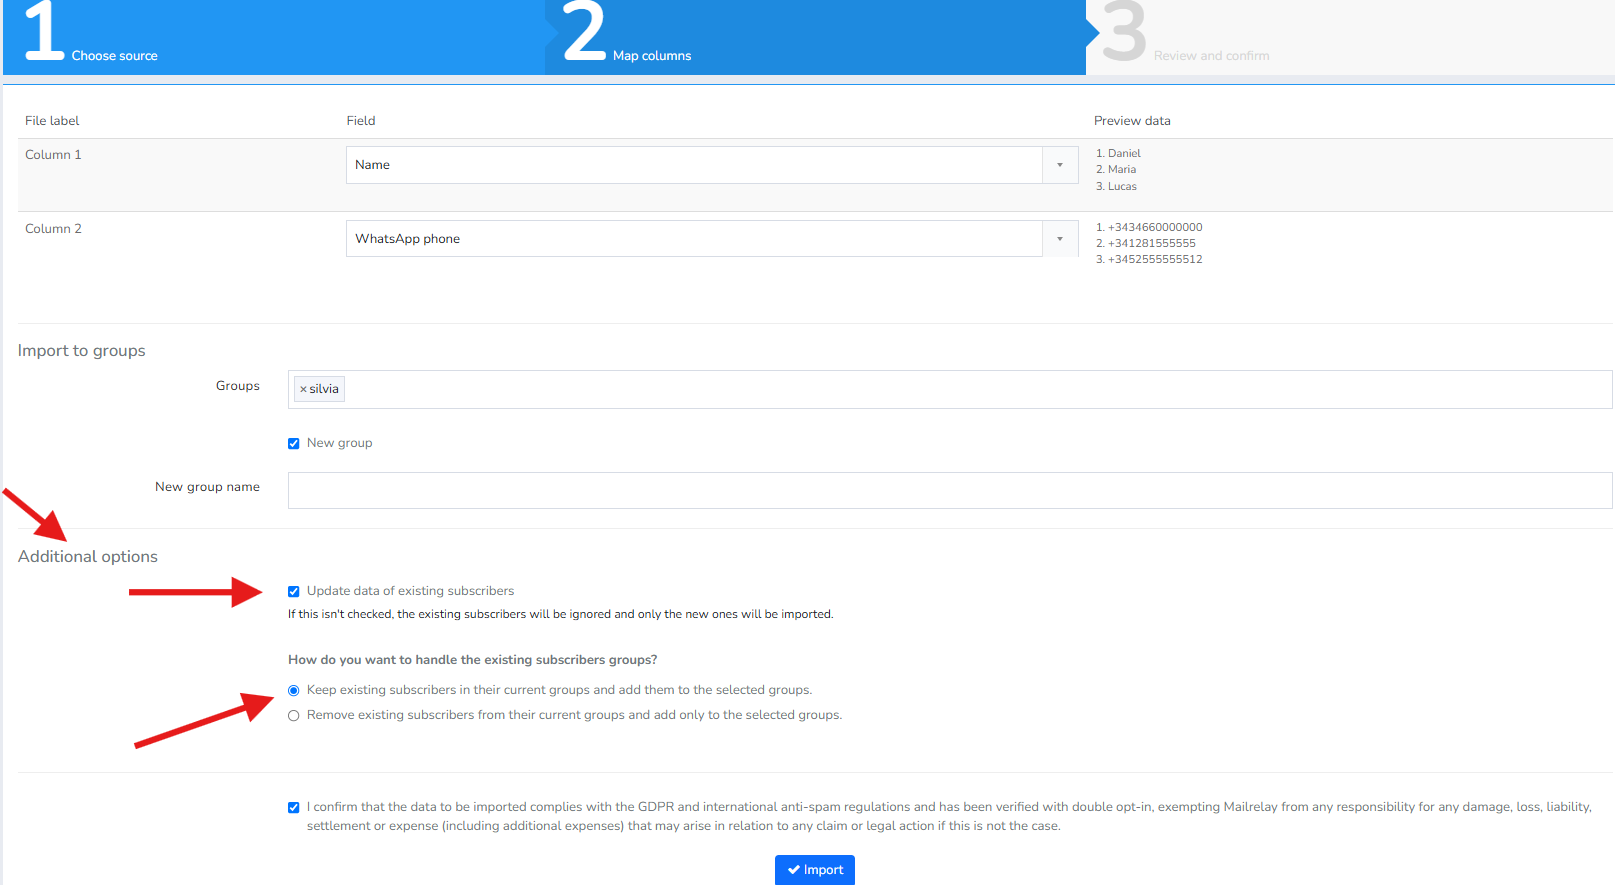
The Additional options area is especially important, as it lets us customize, if needed, how the system should behave when importing contacts that already exist.
To customize it, simply start by checking the Update existing subscribers' data option, and the How would you like to update the groups of existing subscribers? option will automatically appear, with two possibilities, which we will explain in detail:
- Keep subscribers in their current groups and also add them to the newly selected groups: If you check this option, the system will keep the groups that existing contacts already belonged to, update their information with the data being added, and additionally add them to the new group(s) you indicated for the import.
- Remove subscribers from their current groups and add them to the newly selected groups: On the other hand, if you check this option, it will remove the subscribers you import from any other group they previously belonged to, and will add them only to the new group(s) you indicated for the import.
In either case, whether you leave the import at its default settings or take advantage of the options offered in the Additional options area, when you click Import the contacts will be added to the group or groups you selected, ready to be used in your WhatsApp campaigns.
Was this article helpful?
That’s Great!
Thank you for your feedback
Sorry! We couldn't be helpful
Thank you for your feedback
Feedback sent
We appreciate your effort and will try to fix the article