Notification emails
TABLA DE CONTENIDOS
Notification emails is the section that holds the automatic emails your account sends when a specific event occurs. You can find it under Settings > Notification emails.
Each email is available in all the platform languages: English, Spanish, Portuguese (Brazil), French, Galician, Catalan, Basque and Italian. For each language there are two types of email:
- Subscribe confirmation: sent to subscribers so they can confirm their sign-up when they subscribe through a subscription form.
- Forward: sent when a subscriber shares a newsletter with a contact or friend through the {{ forward_url }} variable.
Search bar
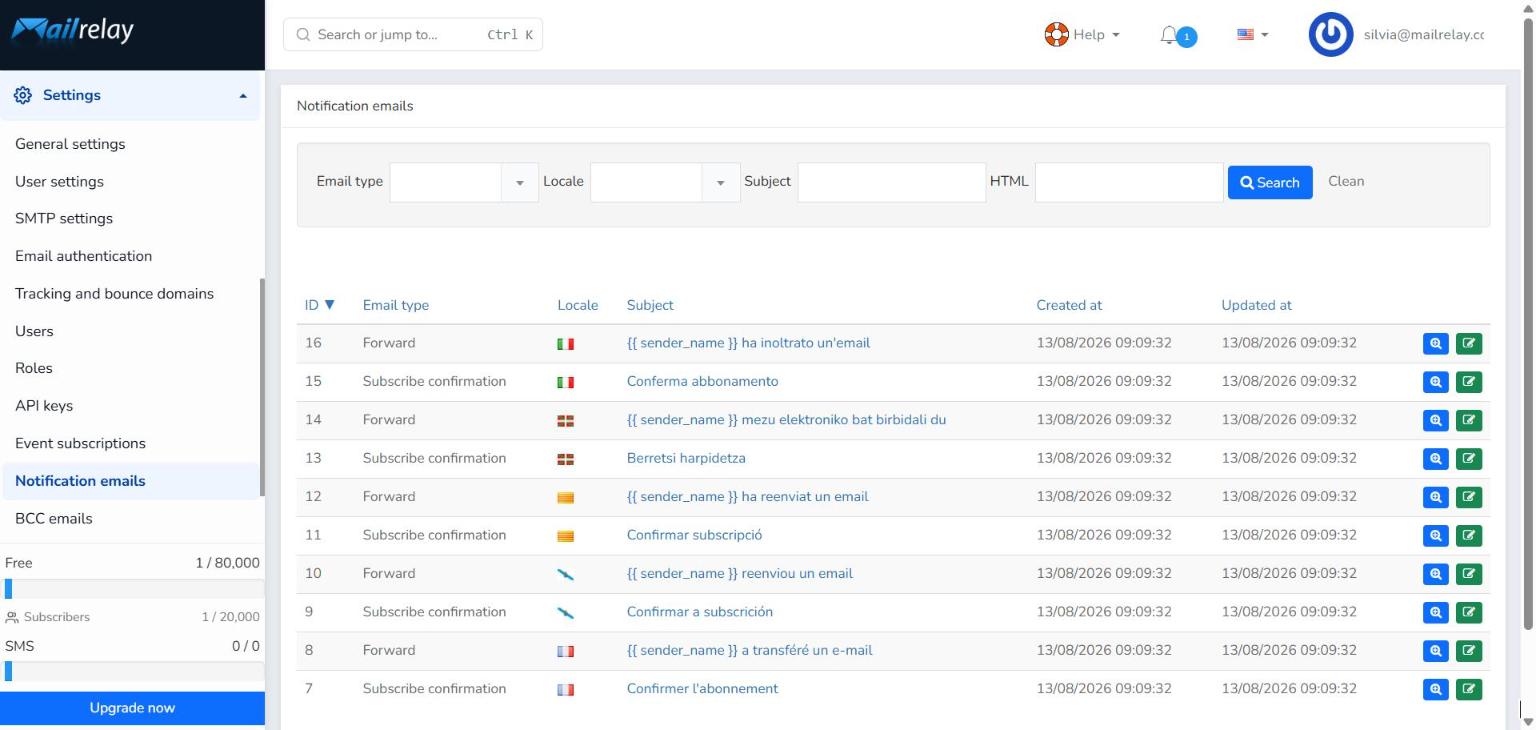
At the top there is a search bar to quickly find the email you need. You can combine four filters:
- Email type: drop-down to choose between Subscribe confirmation and Forward.
- Locale: drop-down to choose the email language.
- Subject: searches for words contained in the subject.
- HTML: searches for words or code contained in the email's HTML content.
Click Search to apply the filters or Clean to clear them.
Results area
Just below, the emails are listed in six columns: ID (unique identifier of the email), Email type, Locale (language flag), Subject, Created at and Updated at (date of the last change). You can sort the list by clicking any column name.
To the right of each email there are two action buttons:
- Show (magnifying glass icon): opens the email details.
- Edit (pencil icon): takes you straight to the Edit notification email tab.
Show notification email
Clicking Show opens the email details, organized in three tabs: Show notification email, Edit notification email and Log.
The Show notification email tab displays all the email information: ID, email type, locale, subject, an HTML preview and the creation and update dates.
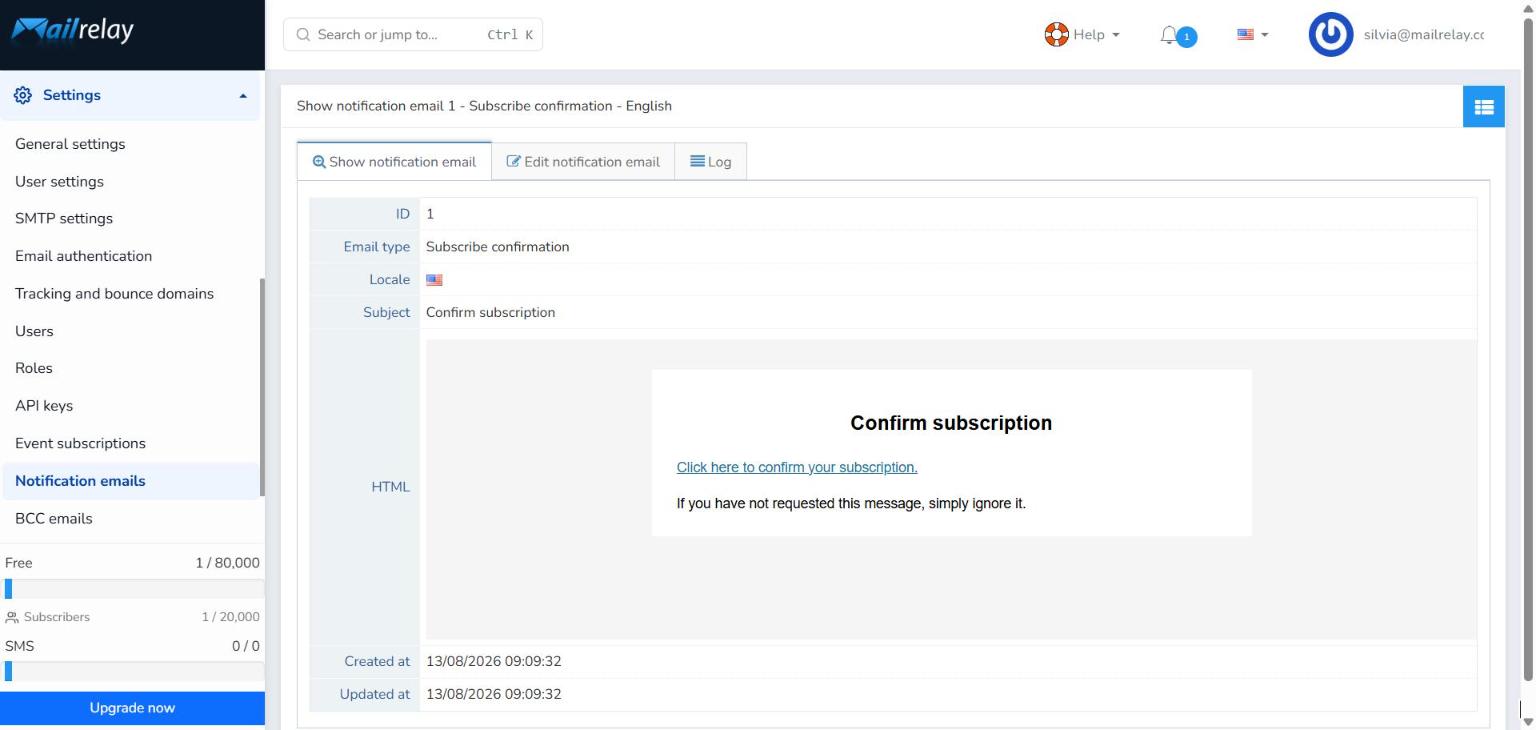
The blue button in the top right corner takes you back to the Notification emails list.
Edit notification email
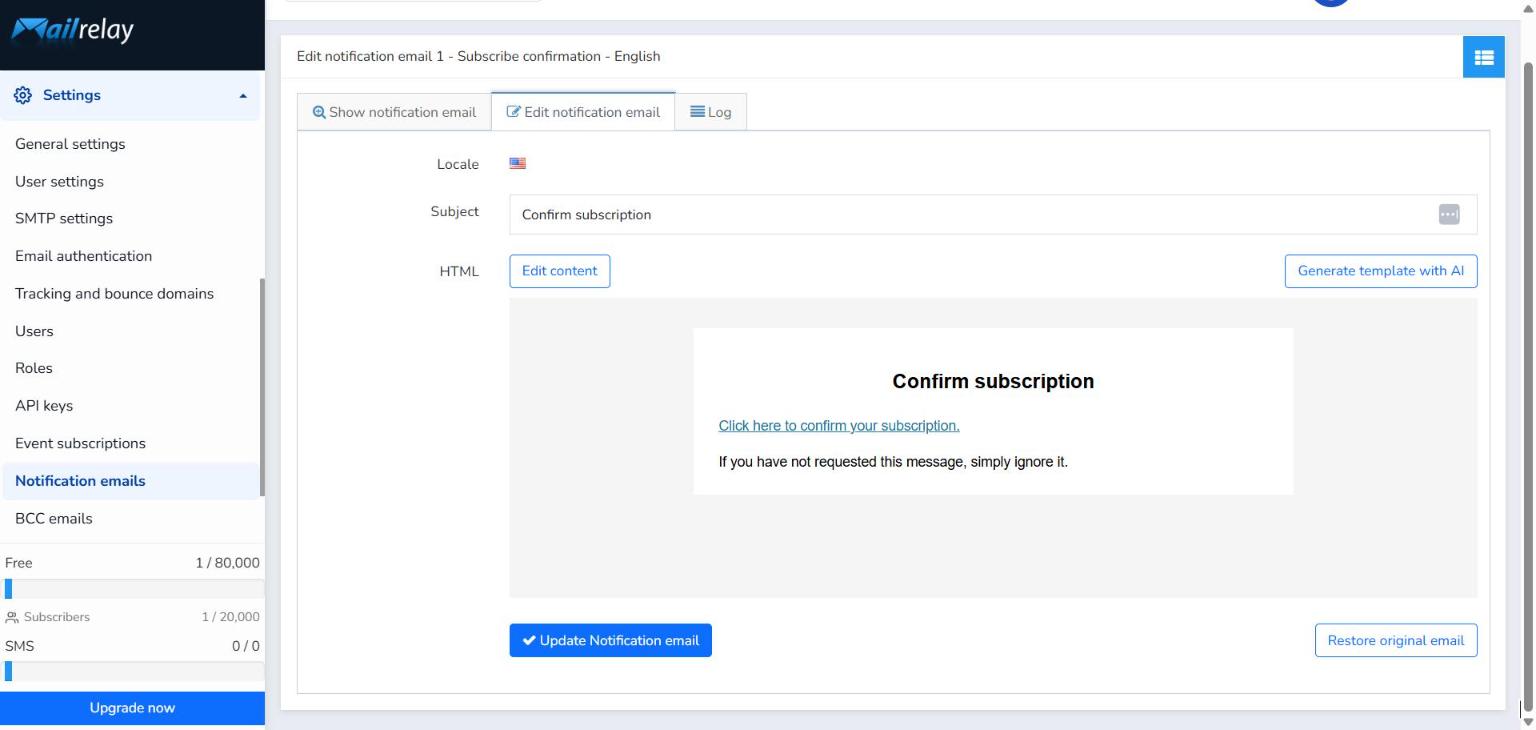
From this tab you can change the Subject and the content of the email. Below the HTML field you will see a preview of the email and two ways to modify it:
- Edit content: opens the visual email editor.
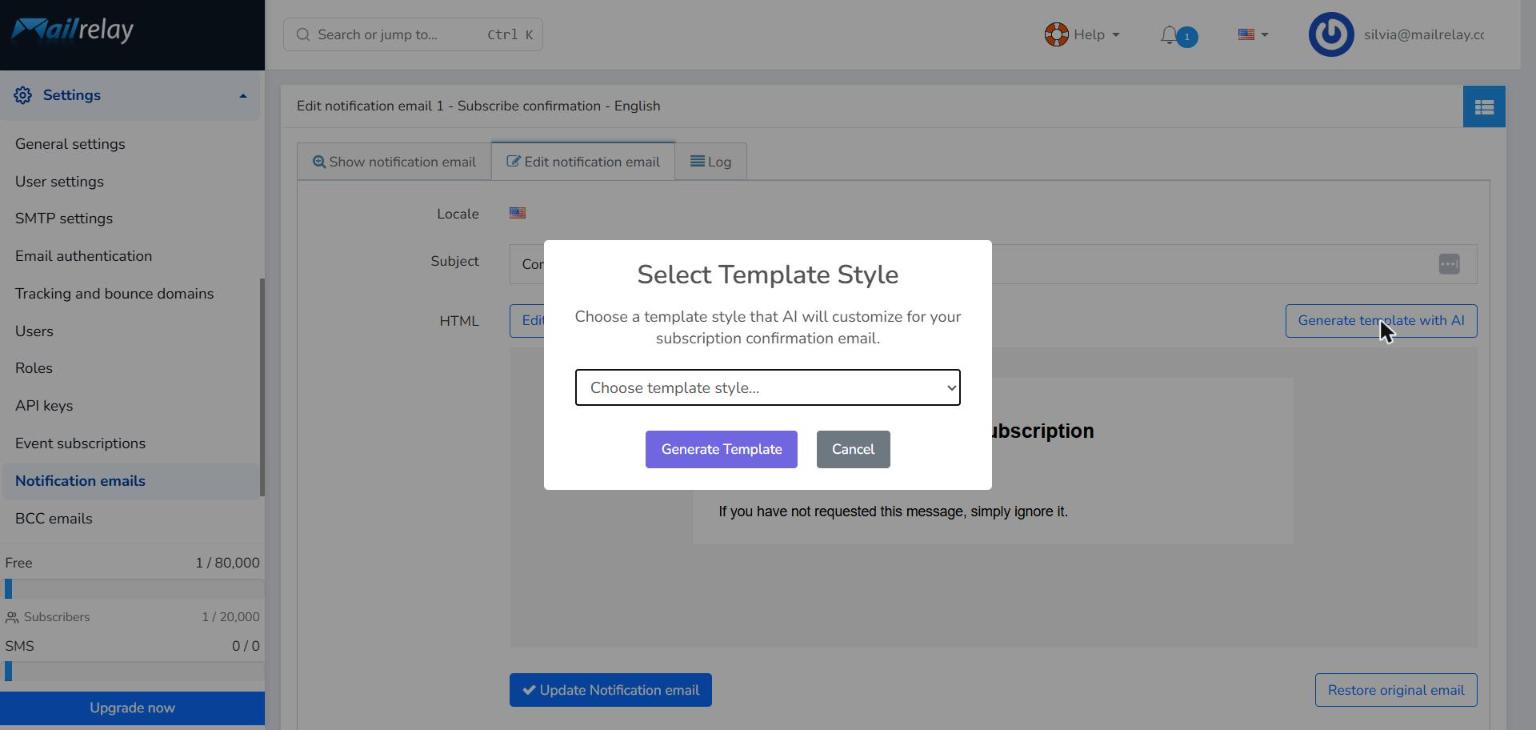
- Generate template with AI: creates a new email design using artificial intelligence.
Content editor
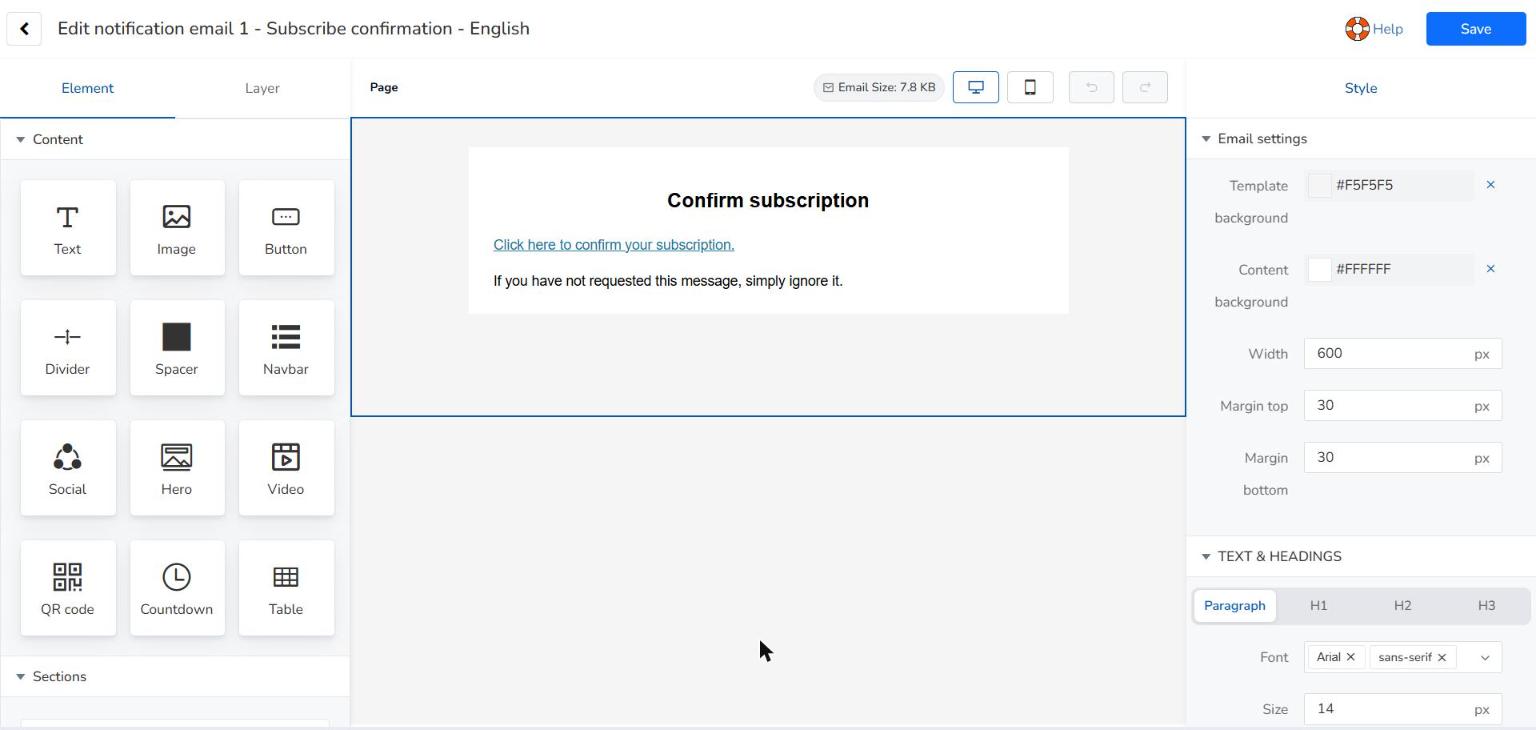
Clicking Edit content opens the drag-and-drop editor:
- Left panel (Element / Layer): content blocks you can drag into the email: Text, Image, Button, Divider, Spacer, Navbar, Social, Hero, Video, QR code, Countdown and Table.
- Central area: email preview, with desktop and mobile views, undo and redo buttons, and the email size.
- Right panel (Style): under Email settings you can change the template background, content background, width and top and bottom margins; under Text & headings, the text styles.
When you are done, click Save. The arrow in the top left corner takes you back to the edit tab.
Generate template with AI
Clicking Generate template with AI opens the Select Template Style window, where you choose the style the AI will customize for your email:
- Minimal: simple and clean design.
- Professional: formal business design.
- Friendly: casual and welcoming design.
Choose a style and click Generate Template, or Cancel to close the window without changes.
IMPORTANT: to save your changes, click Update Notification email. If you made a mistake and want to go back to the default design, click Restore original email.
Log
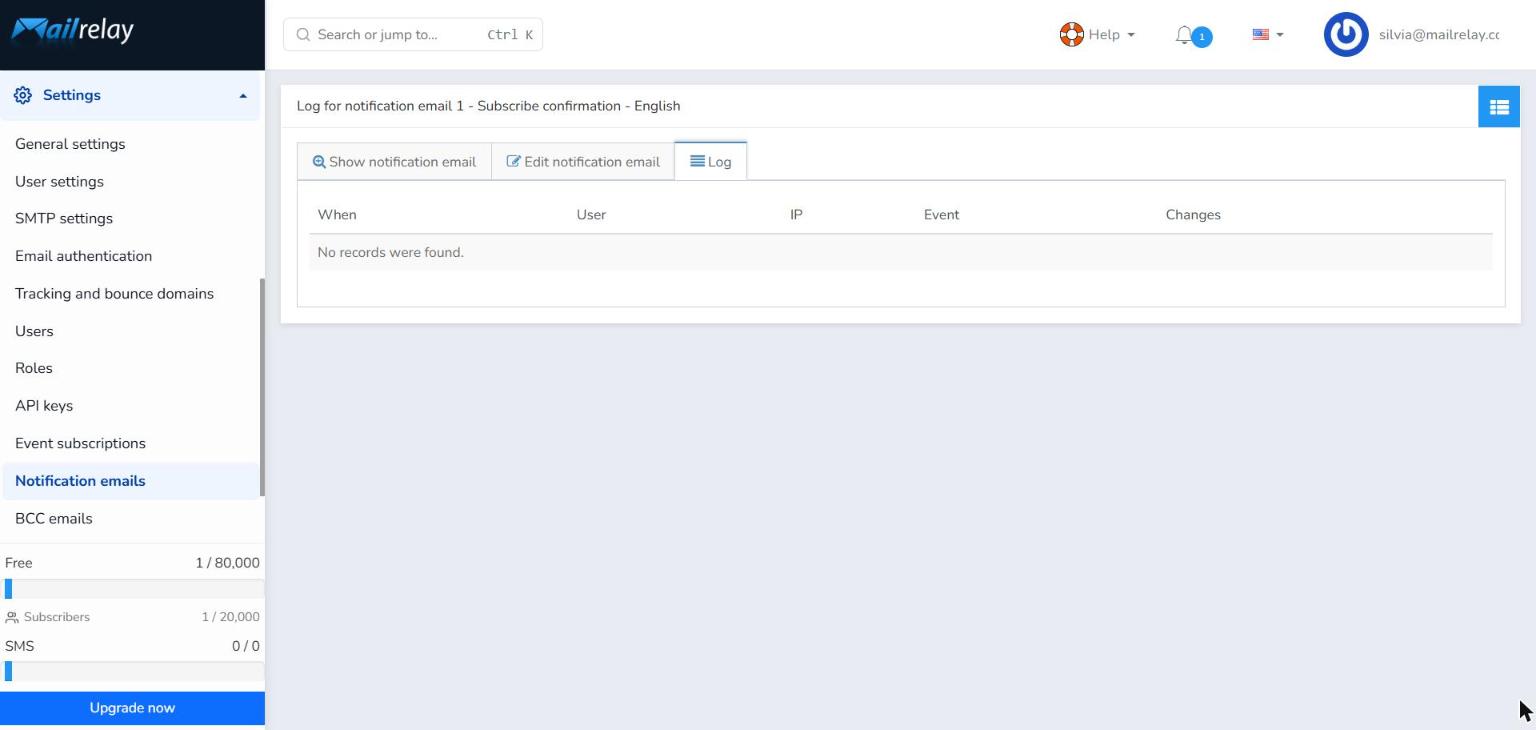
The Log tab shows the history of actions performed on the email, with the columns When, User, IP, Event and Changes. If the email has never been modified, you will see the message No records were found.
Was this article helpful?
That’s Great!
Thank you for your feedback
Sorry! We couldn't be helpful
Thank you for your feedback
Feedback sent
We appreciate your effort and will try to fix the article