Senders
INDEX
Mailrelay accounts can have multiple senders, which can be used to send on behalf of various departments or to allow multiple users to have their own sender account for sending information.
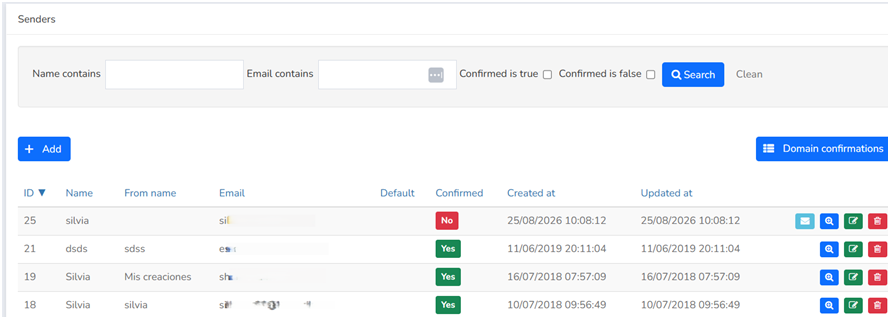
Sender management
To manage the senders you want in your account, simply go to Newsletters >> Senders.
At the top is the search area, which offers four criteria: Name contains, Email contains, Confirmed is true, and Confirmed is false. Click the Search button (which performs the search) and the Clear button (which deletes the filled criteria).
This takes you to the main Senders section, where the information is organized into eight columns plus an actions area:
- These columns are: ID, the sender's unique identifier; Name, the display name; Business Name, the secondary display name; Email, the sender's email address; Default, which indicates whether the sender will be used by default; Confirmed, whether the sender is ready to be used or needs to be confirmed; Created On, the sender's creation date; and Updated On, the date it was last updated.
- This section also provides access to the main Senders section. The actions area includes the following buttons from left to right: Send confirmation email, which forwards the confirmation email to the sender who has not yet confirmed they are the account sender; Show, to view the sender's information; Edit, to edit the sender's information; and Delete, to delete the sender.
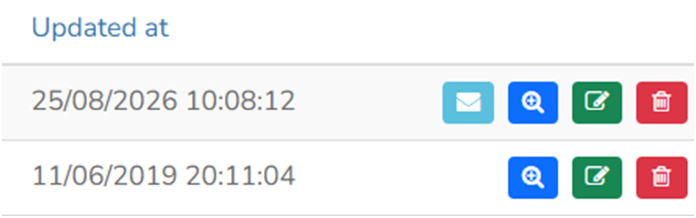
Add a sender
To do this, click +Add and fill in the Name, Company Name, and Email fields. It's recommended that you use the same name for both the Name and Company Name fields, as the email client may use either field interchangeably.
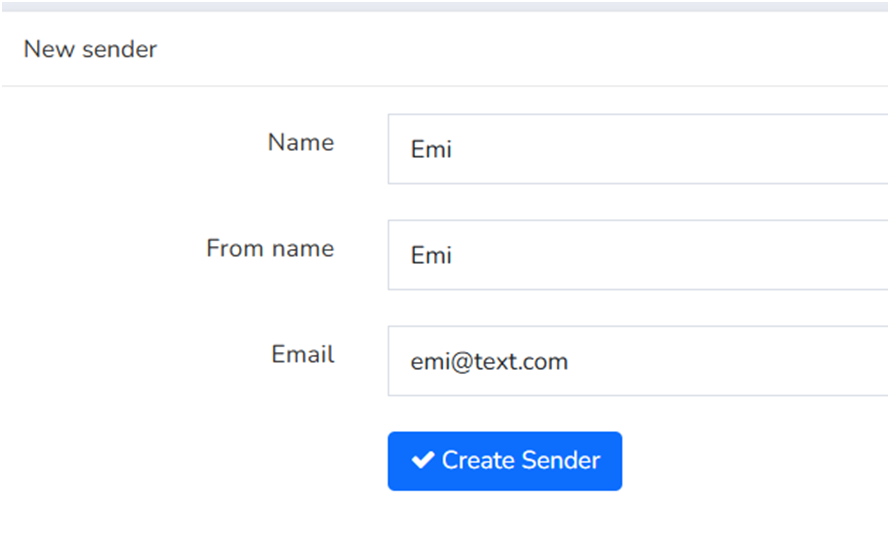
To finish, click on Create Sender, and the email address you want to add as a sender will receive an email where you must click on Click here to confirm your email address so that your email address becomes a confirmed sender.
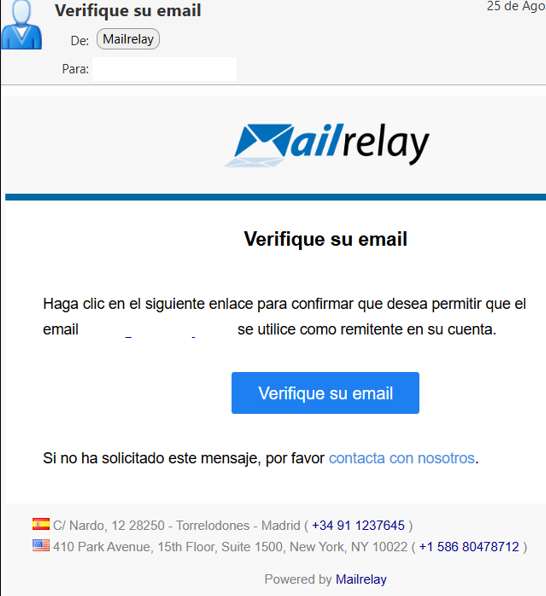
Until that happens, the sender will appear in the general sender list but will remain unconfirmed, and the "Send confirmation email" button will be visible until they confirm.
Editing a Sender
To access the sender's editing area, simply click the green "Edit" icon in the actions area. This will take you to the editing window.
Once a sender is created, it can be edited, but only the Name and Company Name fields. The Email field cannot be edited, as changing the email address would authorize the use of a new sender email without the sender's consent.
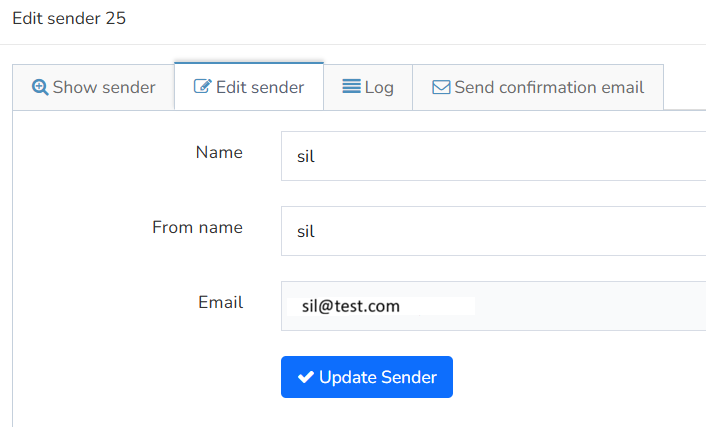
Therefore, if you wish to use a different sender email address, you will need to add it as a new email. You can easily use the same name and company name as an existing sender.
Deleting a Sender
To delete a sender, simply click the red Delete icon in the actions area. This will take you to the confirmation window. In this window, you will be asked to specify a different sender to assign to the newsletters previously sent to the sender you are deleting. This is done using the "Assign newsletters to sender" option.
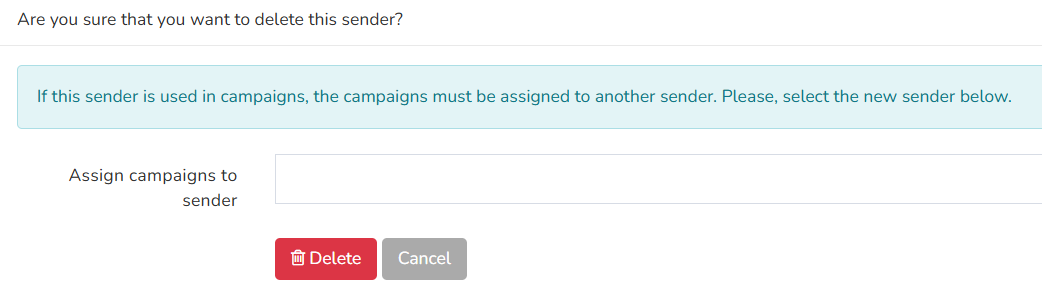
And finally, you must press the Delete button to remove it.
Was this article helpful?
That’s Great!
Thank you for your feedback
Sorry! We couldn't be helpful
Thank you for your feedback
Feedback sent
We appreciate your effort and will try to fix the article