
In Mailrelay you can create signup forms to capture contacts for your newsletter and show them on your website, embedded or in a pop-up. Signup forms are available on the free account.
Each form adds new subscribers to the groups you choose. This way you grow your list for your email marketing campaigns.
Before you start
- At least one group for the new subscribers. You'll find the steps in How to create and use groups.
- If you want to ask for data that Mailrelay doesn't include, the fields created in Subscribers > Custom fields.
Create the form
To start a new form, follow these steps:
- In the menu, click Subscribers > Signup forms and then Add.
- In Name, enter a name to identify the form, for example "Newsletter signup form".
- In Field type used to display groups, choose an option:
- Checkbox: the form shows a box for each group so the subscriber can choose.
- Hidden: the subscriber doesn't see the groups.
- In Groups, choose the groups new subscribers are added to and click Next.

The editor opens with four tabs at the bottom: Form, Design, Content and Configuration. On the right you see how the form looks.
Add fields to the form
In the Form tab, the form already includes Email and Groups. To add more content, use these buttons:
- Add builtin field: fields such as Acceptance, SMS phone, WhatsApp phone, Name, Address, City, State, Country, Birthday or Website.
- Add custom field: the fields you've created in Subscribers > Custom fields.
- Add custom text and Add image: a block of text or an image.
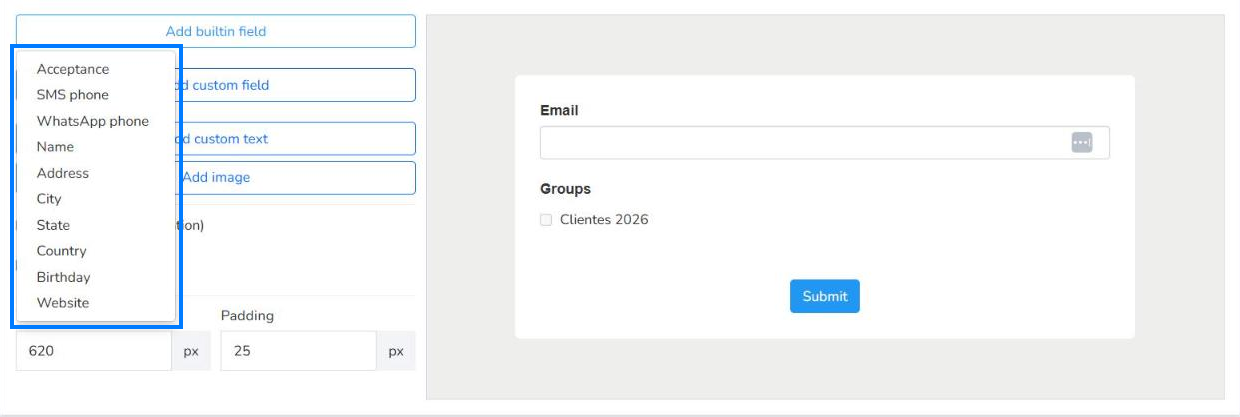
When you add a field, its edit panel opens. There you choose the Field width (Auto or Full width), the Label, the Placeholder and the Hint. In Required? you choose whether it's mandatory. Click Close to go back.
To avoid spam signups, check Captcha (spam prevention). The Enable honeypot field box is already checked. In Width and Padding you change the size of the form and its inner margin, in pixels.
Change the form colors
In the Design tab you choose the colors of each part of the form:
- Body and Content: the Background color of the page and of the form.
- Form: the Label color, Hint color, Placeholder color and Error color.
- Button: the text Color and the Background color.
Choose the confirmation pages
In the Content tab you choose what the subscriber sees at two moments:
- CONFIRMATION EMAIL SENT: after sending the form. The default page says "Please, check your email to activate your account."
- SUBSCRIBE SUCCESS: after confirming their subscription. The default page says "Your subscription was successfully activated."
For each one, choose Use default page, Redirect to an URL or Use a custom page. If you redirect, enter the Success URL. In the first one you can also add an Error URL.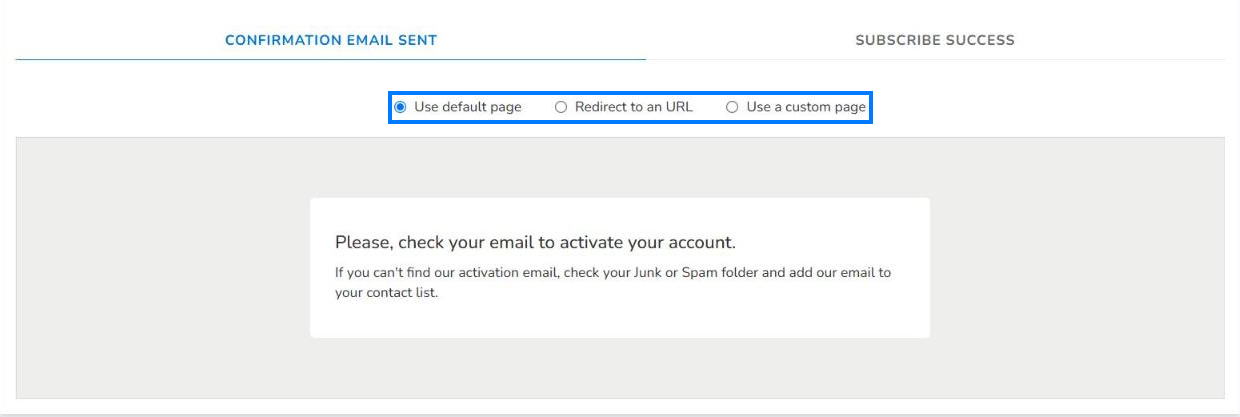
Check the configuration
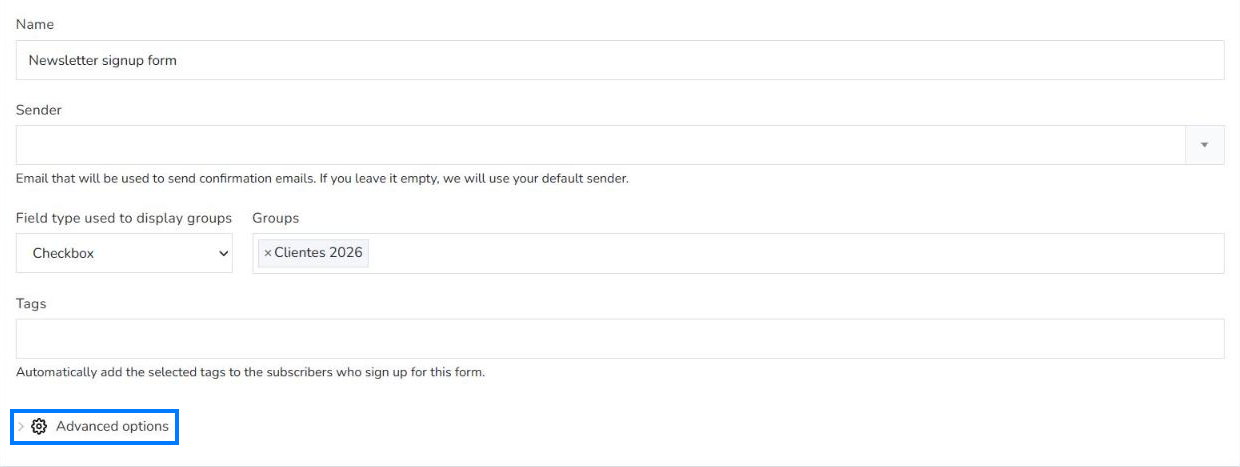
In the Configuration tab you can change the Name, the Field type used to display groups and the Groups. Also:
- Sender: the email used to send confirmation emails. If you leave it empty, your default sender is used.
- Tags: they're added to the subscribers who sign up with this form.
In Advanced options you have two more settings:
- New subscriber notifications: in Send notification emails to, enter one or more emails separated by commas. It's not recommended for high traffic forms.
- Hidden field values: with Add hidden field you choose a field and its value. It's applied when the subscriber confirms their subscription and overwrites any existing value.
Save the form and create the pop-up
When you finish, click Save. The Show signup form page opens with the form details, including its URL. From there you have Edit signup form, Log, Conversions, Generate code, View form and Delete.
The same form works for your website and for a pop-up. To choose how to show it, follow these steps:
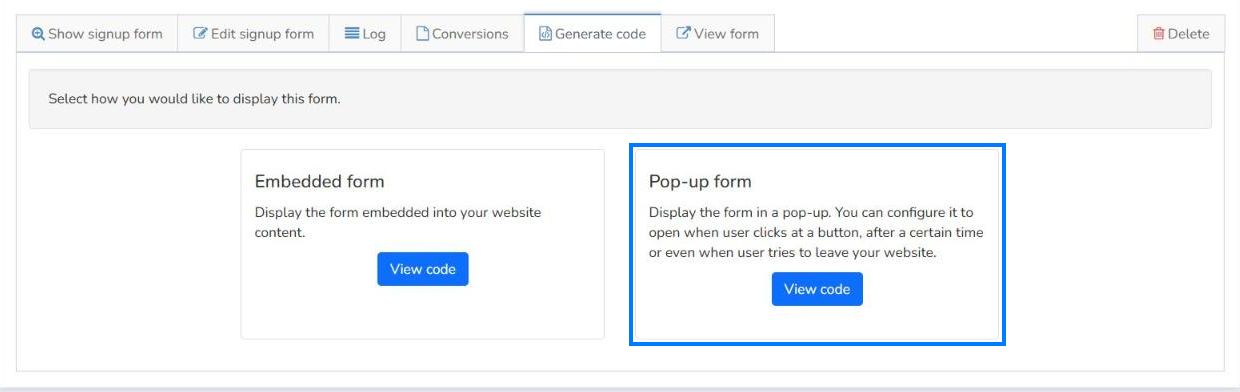
- Click Generate code.
- In Embedded form or Pop-up form, click View code. The pop-up can open when the user clicks a button, after a certain time or when they try to leave your website.
You'll find the steps to copy the code and add it to your website in How to install a signup form on a website.
Frequently asked questions
These are the most common questions about signup forms.
Does Mailrelay include signup forms and pop-ups?
Yes. You create the form in Subscribers > Signup forms and show it on your website embedded, in a pop-up or at its own URL.
Are they available on the free account?
Yes. You can create signup forms with the free account of this email marketing platform.
Can I have several forms?
Yes. Each form has its own fields, groups and URL.