Blacklist imports
TABLA DE CONTENIDOS
- Blacklist imports
- What file you need to import into the blacklist
- How to import emails into the blacklist
- Block emails that are not subscribers
- Blacklist import history
- Add an existing subscriber to the blacklist
- Remove a subscriber from the blacklist
- Frequently asked questions
- What format should the blacklist file have?
- Can I block emails that are not subscribers in my account?
- Can I add a single subscriber to the blacklist without importing a file?
- How do I remove a subscriber from the blacklist?
- Can I remove from the blacklist an email that is on an advertising exclusion list?
- How do I know how many emails have been added to the blacklist?
Sometimes you need to make sure that, under no circumstances, certain email addresses receive your campaigns. To do this, you need to ban those emails and import them into the Mailrelay blacklist so that they are blocked.
If you want to learn more about managing your contacts, see the article Subscriber management.
What file you need to import into the blacklist
You can add to the blacklist both emails that are subscribers and email addresses that are not registered as subscribers. To do this, simply create a .txt or .csv file containing only one email per line.
A simple example of a correctly formatted .txt file would be:
name1@domain.com
name2@domain.net
name3@domain.com
name4@domain.eu
name5@domain.com
name6@domain.es
name7@domain.com
name8@domain.edu
name9@domain.cl
How to import emails into the blacklist
To access this section, go to the Subscribers > Blacklist imports menu.
The search bar at the top lets you apply some simple filters using two search conditions: ID and Filename contains. Next to them are the Search button and the Clean button, which clears the data you have entered.
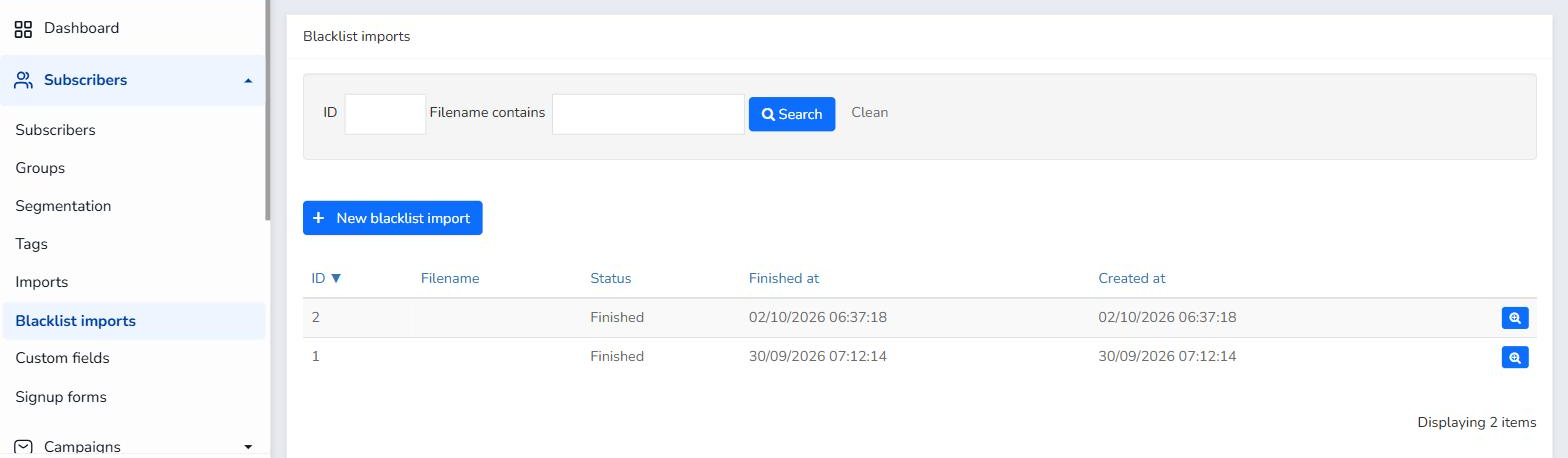
Below them is the + New blacklist import button. To import the emails, follow these steps:
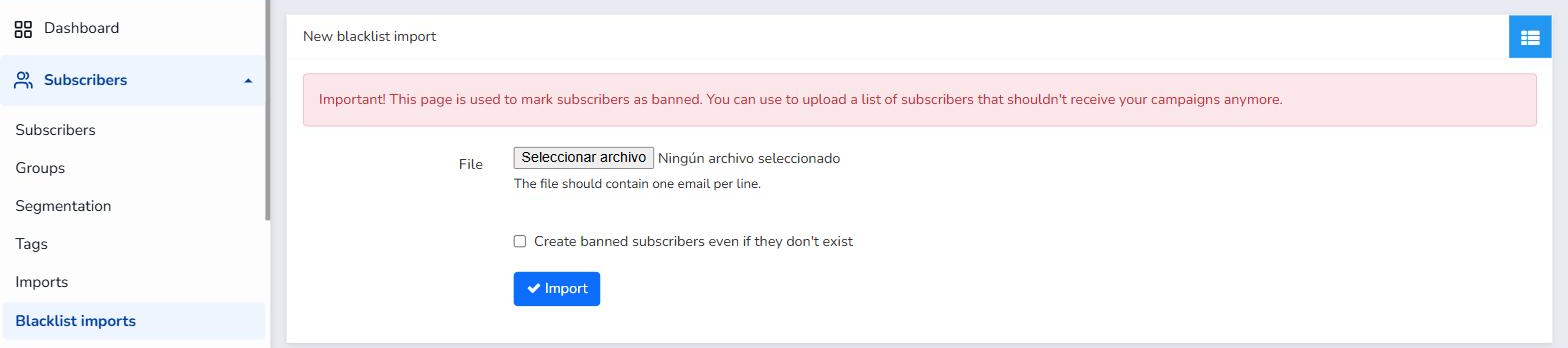
- Click the + New blacklist import button. The import process starts and a new window opens.
- Click the file selection button to open a file browser and choose the .TXT or .CSV file with the contacts you want to block and add to the blacklist.
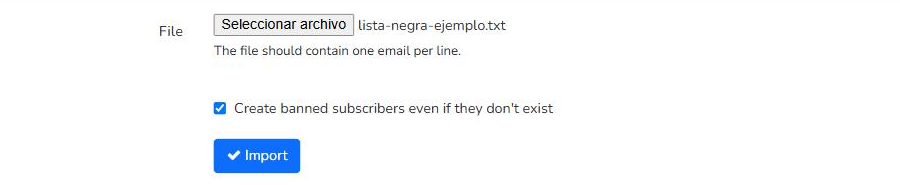
- If you also want to block emails that are not subscribers, tick the Create banned subscribers even if they don't exist option (we explain it below).
- Click the Import button.
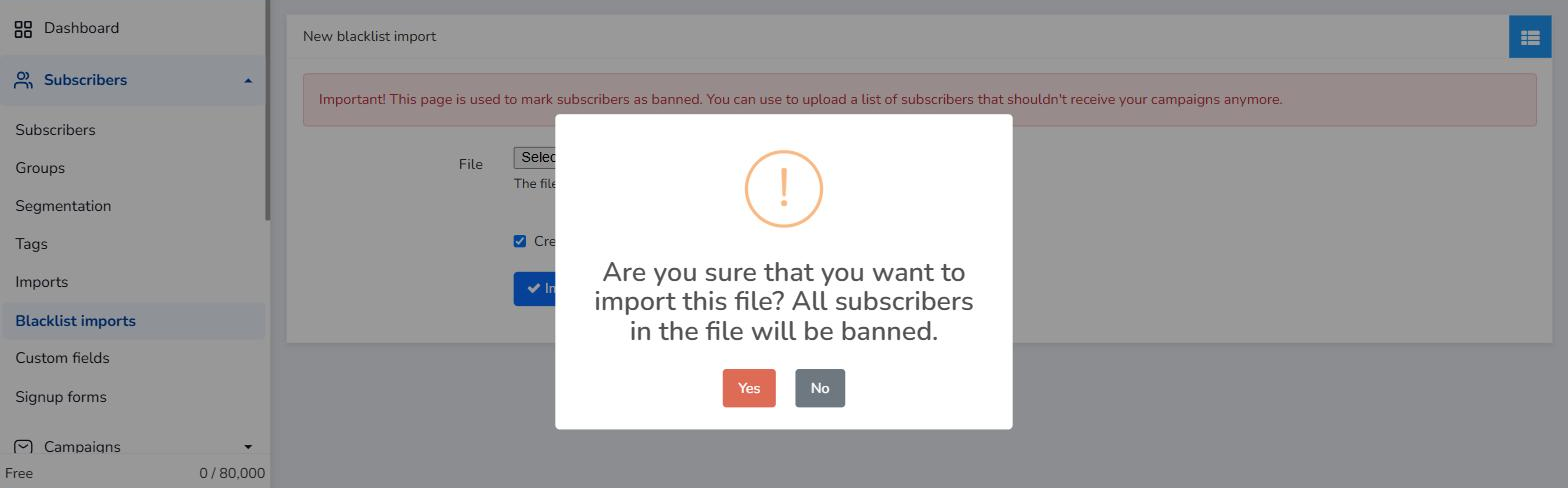
- In the confirmation pop-up window, click Yes.
At the top of this window you will see a notice reminding you that this page is used to mark subscribers as banned, that is, to upload a list of subscribers that should no longer receive your campaigns.
Block emails that are not subscribers
The system also offers you an important setting: the Create banned subscribers even if they don't exist option.
By default, this option is unticked and emails that are not in the account's contact lists are not imported.
Tick this option to add to the blacklist even contacts that have never been added to the account.
Before the process starts, a pop-up window will appear with the message: Are you sure that you want to import this file? All subscribers in the file will be banned. You must click Yes to continue with the blacklist import.
Once you confirm, you will see a message confirming that the blacklist import has been created successfully. The import will remain pending until the process ends and its status changes to Finished.
Blacklist import history
The results area shows a history of the files you have imported, using five columns of information: ID, Filename, Status (whether the import has finished or is in progress), Finished at and Created at.
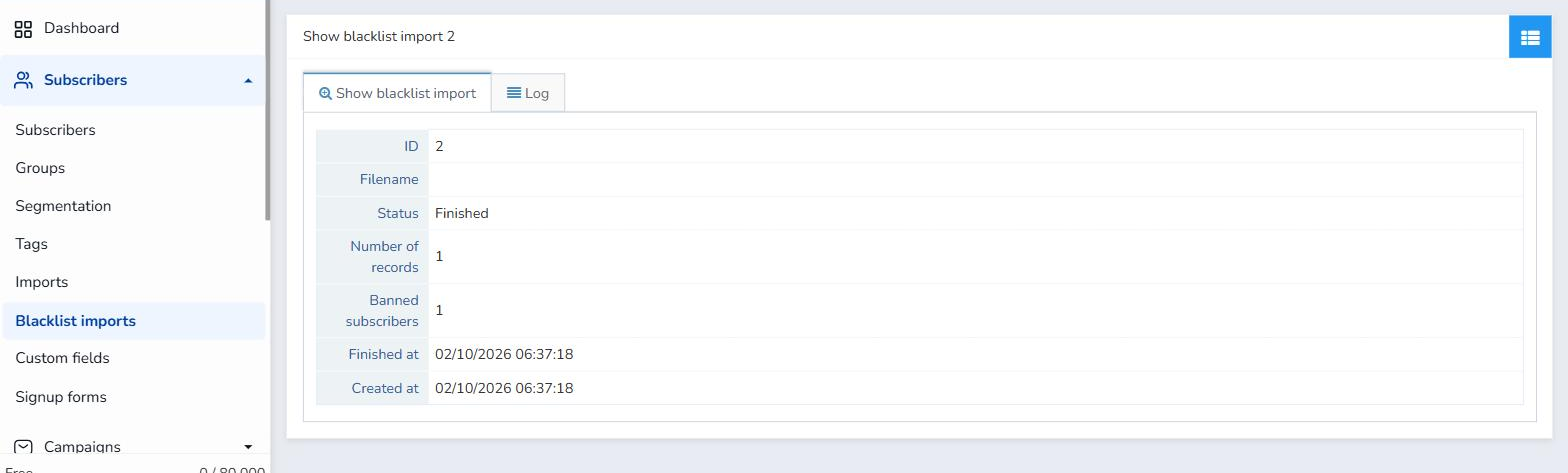
Next to each import there is a magnifying glass button that, when clicked, shows a summary of the import: ID, filename, status, Number of records, Banned subscribers and the finish and creation dates. In the Log tab you can view the change history of the import (when each event happened, the user, the IP address and the status changes).
Add an existing subscriber to the blacklist
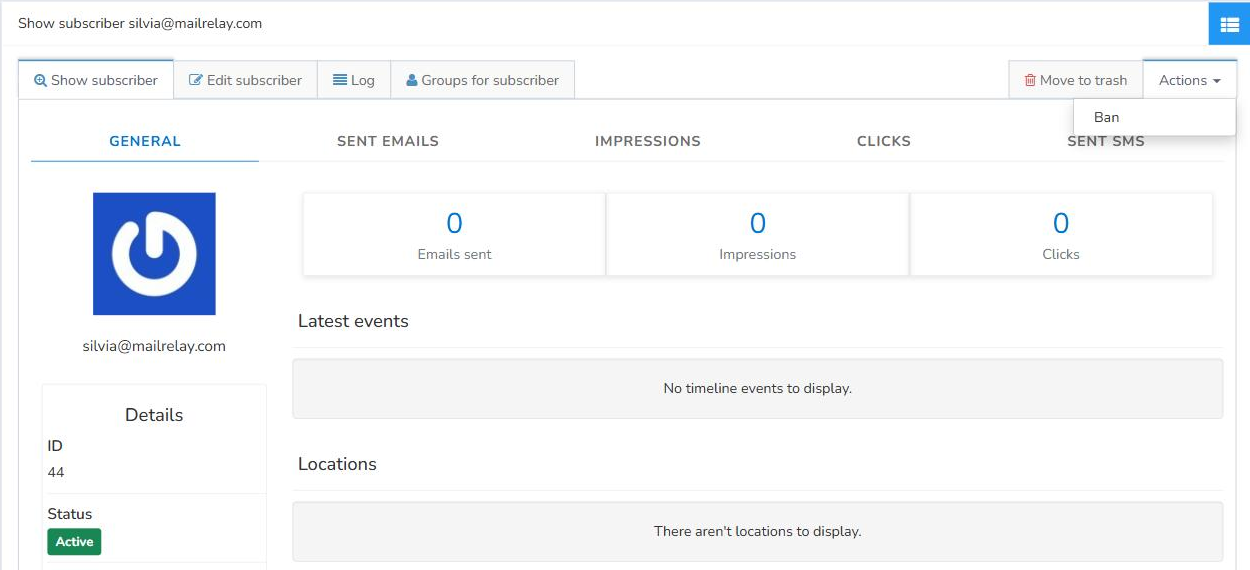
If you only want to block a specific subscriber who is already in your account, you don't need to create a file. You can add them to the blacklist directly from their profile:
- Go to the Subscribers > Subscribers menu and click the subscriber you want to block.
- In the subscriber's profile, click the Actions button at the top right.
- Select Ban.
Remove a subscriber from the blacklist
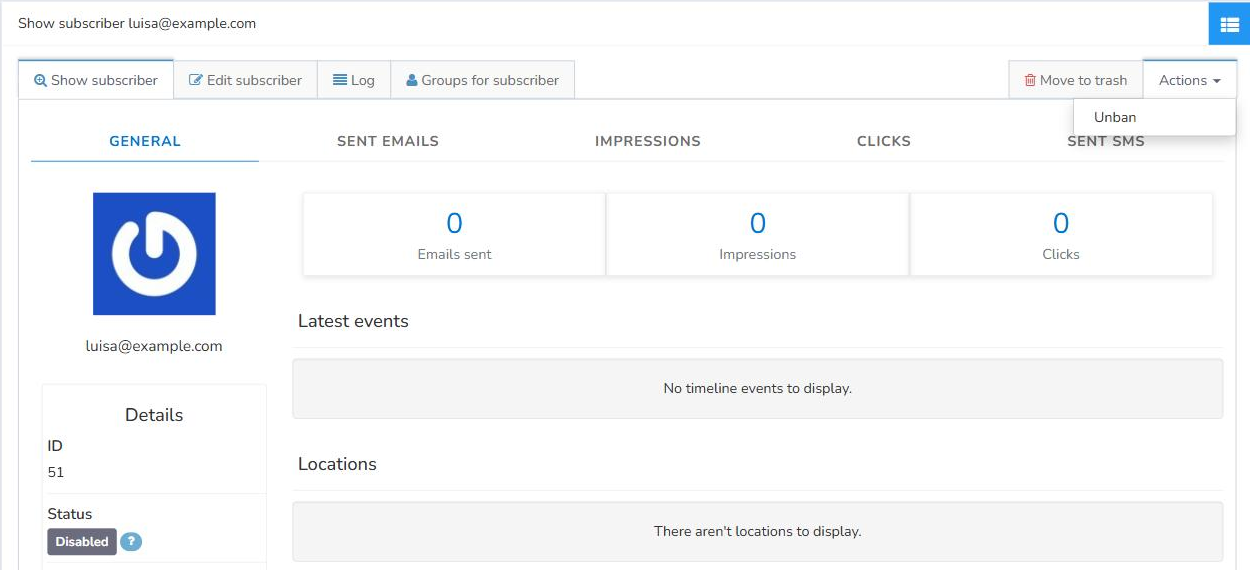
If the subscriber is already on the blacklist, in that same Actions menu you will see the Unban option. Click it to remove them from the blacklist.
Important: you can only remove from the blacklist the emails that you added yourself. If an email is blocked on the blacklist because it appears on an advertising exclusion list, you will not be able to remove it from the blacklist.
Frequently asked questions
What format should the blacklist file have?
A .txt or .csv file with only one email per line.
Can I block emails that are not subscribers in my account?
Yes. Tick the Create banned subscribers even if they don't exist option before clicking Import. If you leave it unticked, only the emails that already exist in your account will be blocked.
Can I add a single subscriber to the blacklist without importing a file?
Yes. Open the subscriber's profile, click Actions and select Ban.
How do I remove a subscriber from the blacklist?
Open the subscriber's profile, click Actions and select Unban. Keep in mind that you can only do this with emails that you added to the blacklist yourself.
Can I remove from the blacklist an email that is on an advertising exclusion list?
No. If an email is blocked on the blacklist because it appears on an advertising exclusion list, you will not be able to remove it from the blacklist.
How do I know how many emails have been added to the blacklist?
Click the magnifying glass button for the import. In the summary you will see the file's Number of records and how many Banned subscribers have been added.
Was this article helpful?
That’s Great!
Thank you for your feedback
Sorry! We couldn't be helpful
Thank you for your feedback
Feedback sent
We appreciate your effort and will try to fix the article