Tags in Mailrelay: how to create, assign and use them to segment
Mailrelay tags let you label your subscribers by stage, interest or behavior: Interested, Customer, VIP, Inactive… You can then filter by them, build segments and trigger automations, so each contact gets the email they need at the right time.
In this guide you will learn how to create tags, every way to assign them (manually, in bulk, from signup forms and with automations) and how to use them to filter and segment your list.
Table of contents
- 1. What are tags and how are they different from groups and segments?
- 2. How to create a tag
- 3. How to assign tags to your subscribers
- 4. How to view and filter subscribers by tag
- 5. How to segment by tags
- 6. Frequently asked questions about tags
1. What are tags and how are they different from groups and segments?
A tag is a label you assign to a subscriber to identify them. It has no value attached: it simply shows that the contact belongs to a category or has reached a stage. The same subscriber can have several tags at once.
Tags are especially useful for following your contacts through a sales funnel. For example: a contact who signs up gets the Subscribed tag; when they show interest they move to Interested, and when they buy, to Customer.
| Tags | Groups | Segments | |
|---|---|---|---|
| What they are for | Labeling stages, interests or behaviors | Organizing contact lists | Selecting contacts that meet certain conditions |
| How they change | Added or removed manually, in bulk, from forms or with automations | Static, until you change them | Dynamic, they update themselves |
| Several per subscriber | Yes | Yes | Yes |
| Example | Customer, VIP | Monthly newsletter | Customers in Spain who opened a campaign in the last 30 days |
The three tools work together: you can use tags as a condition inside a segment.
2. How to create a tag
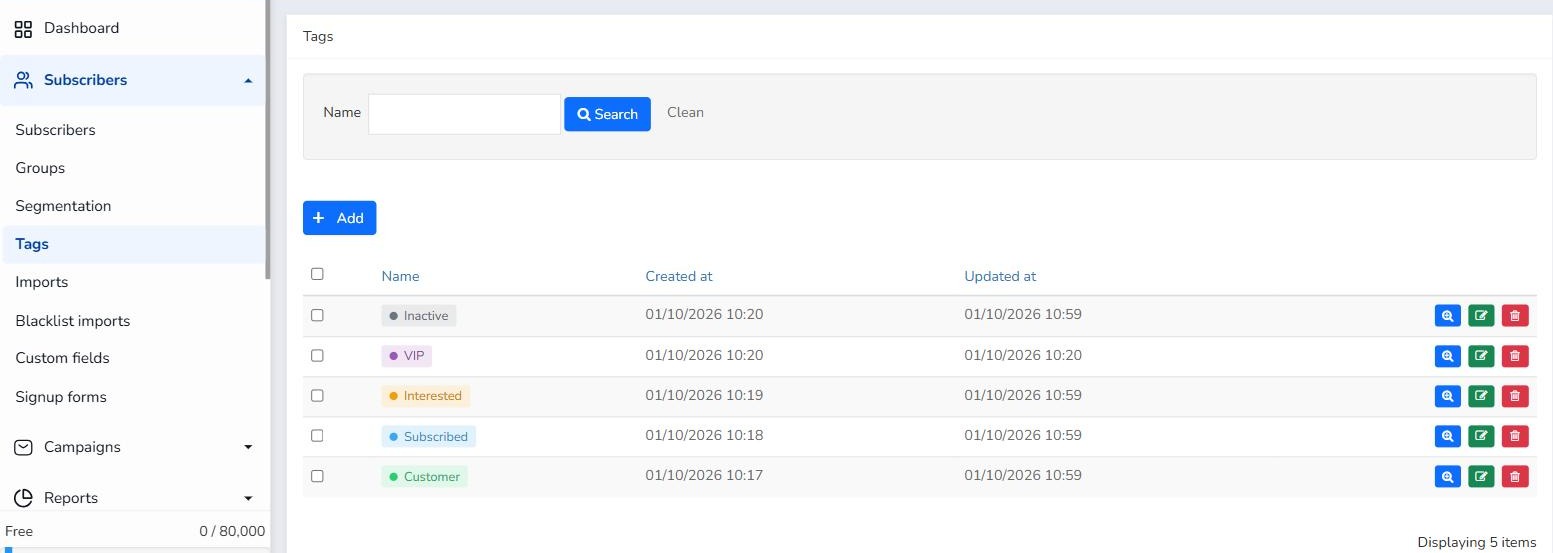
- Go to Subscribers > Tags. You will see the list of tags in your account, which you can search by Name. Use the icons on the right to view, edit or delete each tag.
- Click Add.
- Enter the tag Name.
- Choose a Color. Under Preview you will see how the tag will look.
- Click Create Tag.
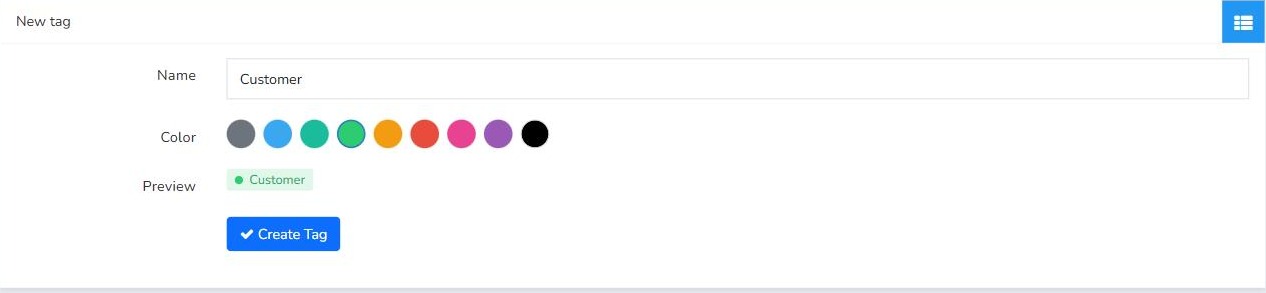
Tip: use a different color for each type of tag (for example, green for customers and orange for interested contacts). That way you will spot them at a glance in the subscribers list.
3. How to assign tags to your subscribers
3.1 To a single subscriber
- Go to Subscribers > Subscribers and click the edit icon next to the contact.
- In the Tags field, start typing the tag name and select it. You can add several.
- Click Update Subscriber.
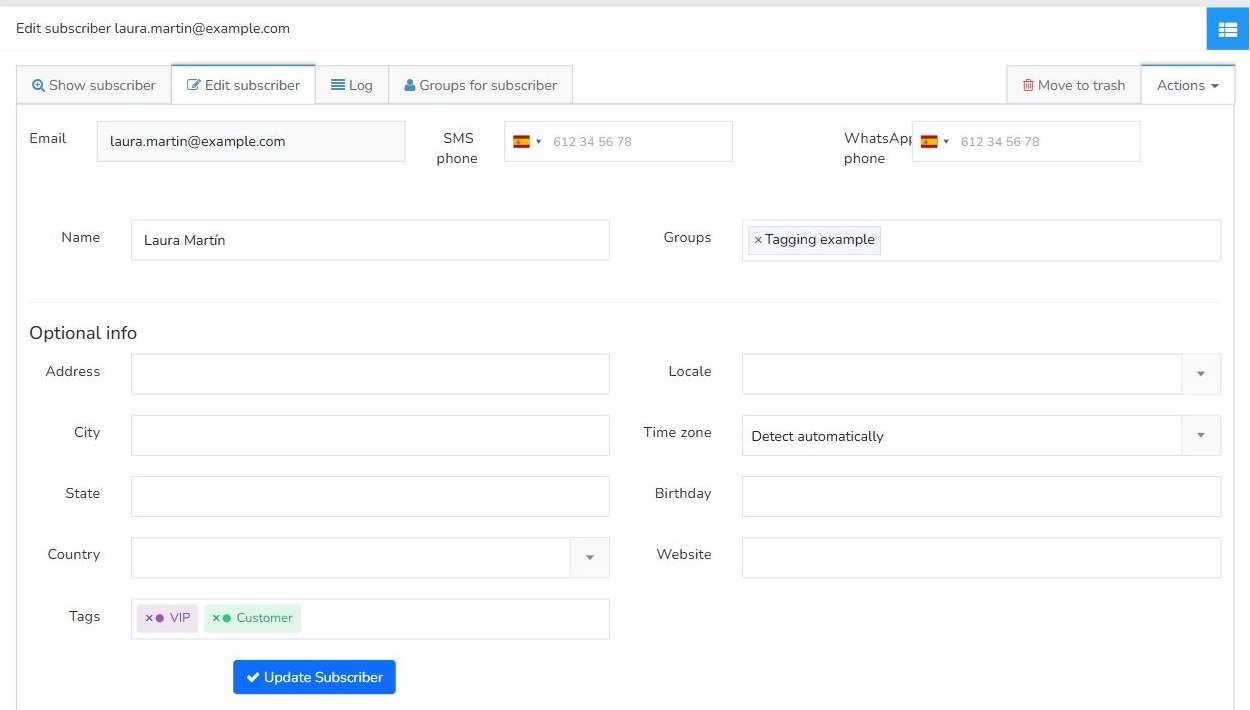
If you type a name that does not exist yet, the drop-down list lets you create the tag right there. To remove a tag, click the × next to it.
3.2 To several subscribers at once (Mass edit)
This is the fastest way to tag many contacts, for example everyone in a group or everyone you have filtered with the search.
- In Subscribers > Subscribers, check the box next to the contacts you want to tag.
- Click Mass edit.
- In Action, select Add tags (or Remove tags to remove them).
- In Tags, choose one or more tags.
- Click Submit and confirm.
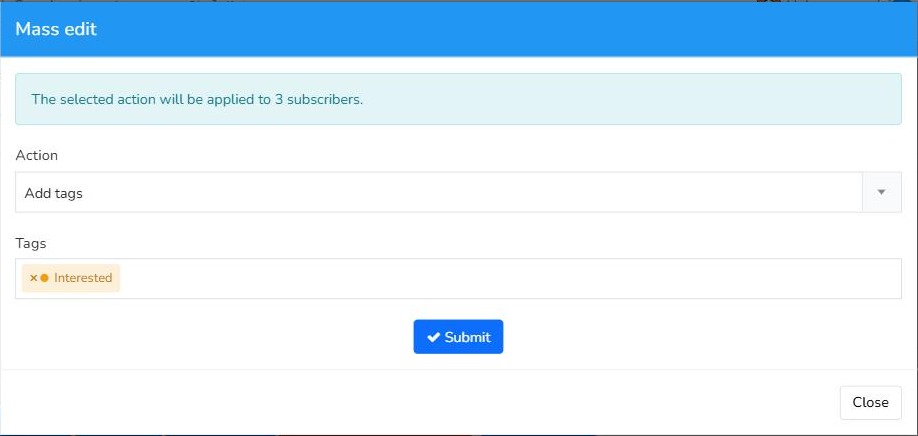
The window tells you how many subscribers the action will be applied to. Before running it, Mailrelay asks you to confirm and warns you that the action cannot be undone, so check your selection carefully.
3.3 From a signup form
You can make every contact who signs up through a form automatically receive one or more tags.
- Go to Subscribers > Signup forms and create or edit a form.
- Open the Configuration tab.
- In the Tags field, select the tags you want to assign (for example, Subscribed).
- Click Save.
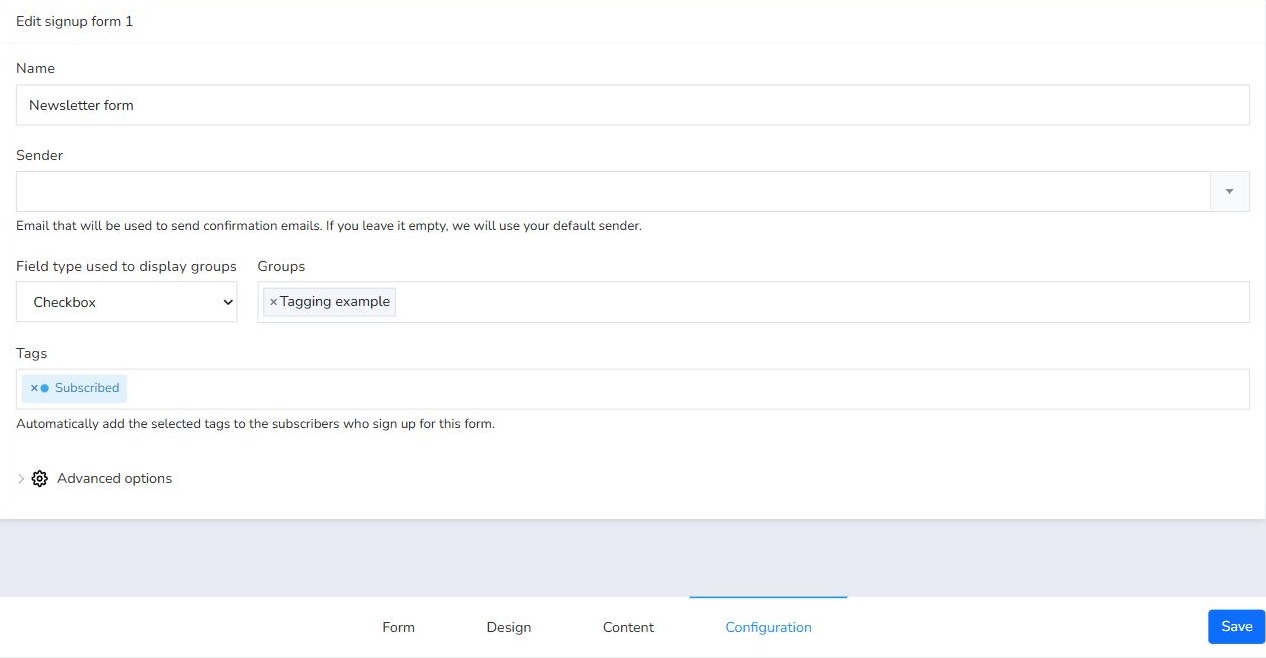
This way you will always know which subscribers joined your list through each form.
3.4 With an automation
Tags and automations work in both directions:
- As an entry point: the automation can start When a subscriber is tagged or When a subscriber is untagged with a specific tag.
- As an action: inside the workflow you can add the Add tags or Remove tags blocks, for example after a condition or an email.
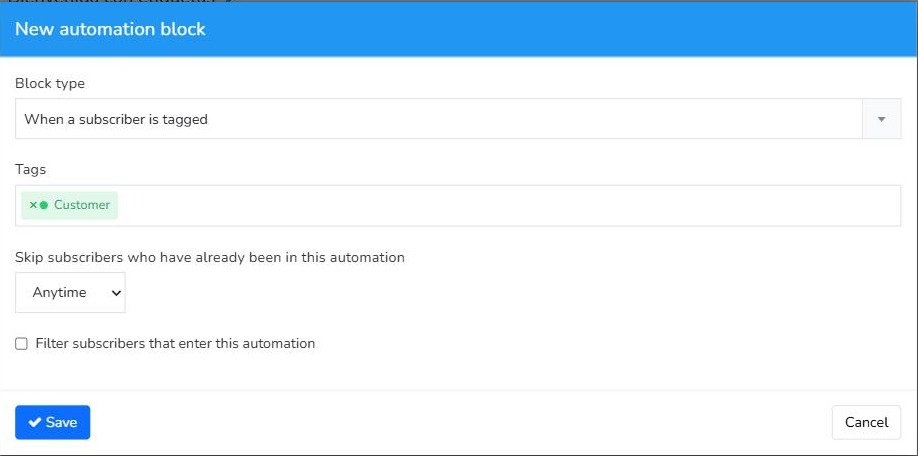
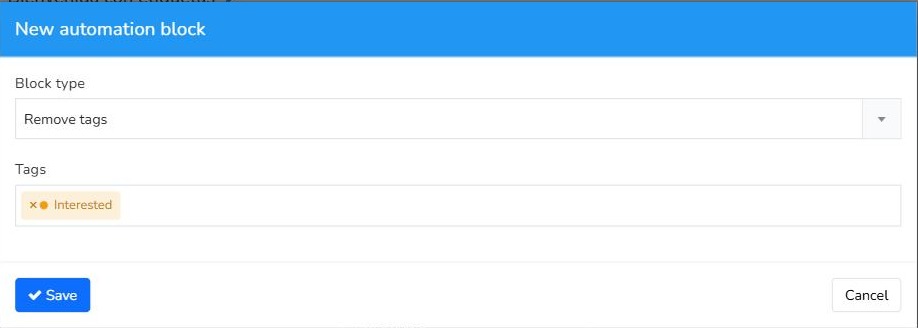
Example: when a contact gets the Customer tag, the Interested tag is removed automatically.
- Go to Automations, create an automation and click New entry point.
- In Block type, select When a subscriber is tagged and, in Tags, choose Customer. Click Save.
- Click Add below the entry point.
- In Block type, select Remove tags and, in Tags, choose Interested. Click Save.
The workflow looks like this:
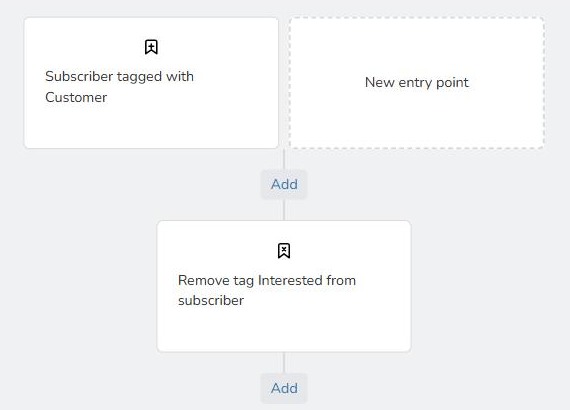
Remember to enable the automation from Change status once it is ready.
3.5 Can you assign tags when importing contacts?
When you import subscribers, you cannot map a column in your file to tags. If you need to tag the contacts you import:
- Import them into a group (you can create a new one during the import).
- In Subscribers > Subscribers, filter by that group and select all the contacts.
- Use Mass edit > Add tags, as explained in section 3.2.
4. How to view and filter subscribers by tag
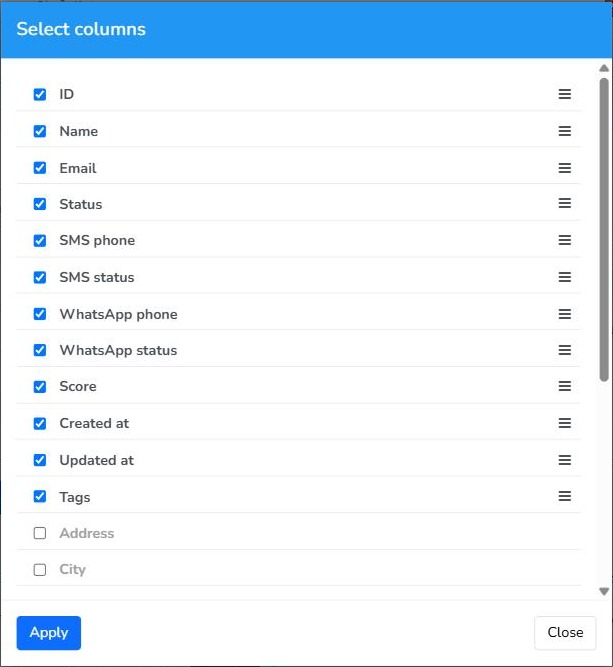
Show the tags column. By default, the subscribers list does not show tags. To see them, click the gear icon on the right of the table header, check Tags in Select columns and click Apply.
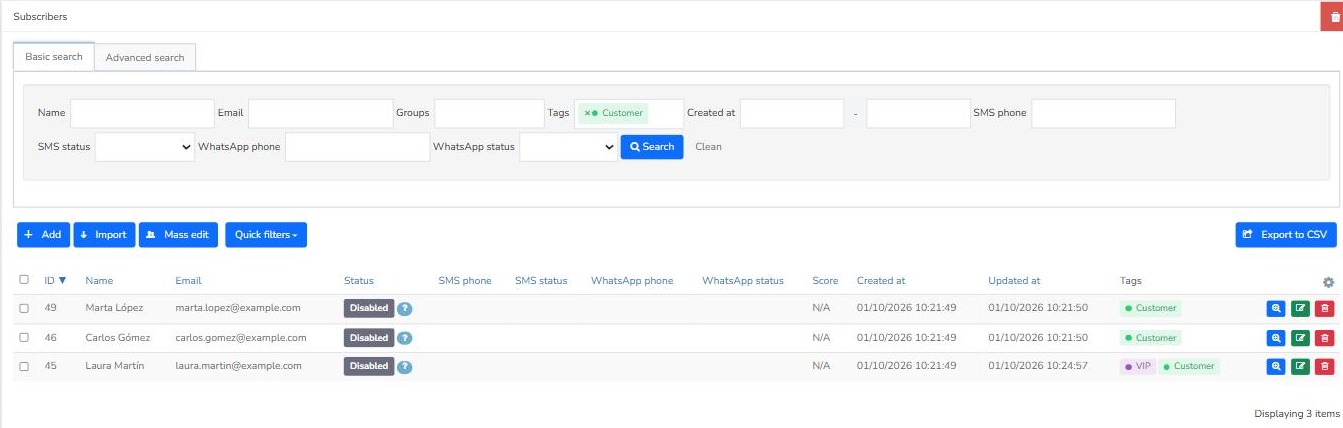
Filter by tag. In Basic search, select one or more tags in the Tags field and click Search. If you choose several, you will see the subscribers who have any of them.
For more precise searches, use Advanced search with the Subscriber tags condition, which works just like it does in segmentation.
5. How to segment by tags
In Subscribers > Segmentation, the Subscriber tags condition lets you build dynamic segments from your tags. It has three operators:
| Operator | Includes subscribers who… | Example |
|---|---|---|
| Has any of | Have at least one of the selected tags. | Customer or VIP |
| Has all of | Have all the selected tags at the same time. | Customer and VIP |
| Has none of | Have none of the selected tags. | Neither Customer nor VIP |
For example, to send a promotion to customers and VIPs:
- Go to Subscribers > Segmentation > Add and enter a name, for example Customers and VIP.
- In the condition, select Subscriber tags, the Has any of operator and the Customer and VIP tags.
- Click Preview to see which subscribers meet the condition and then click Create Segment.
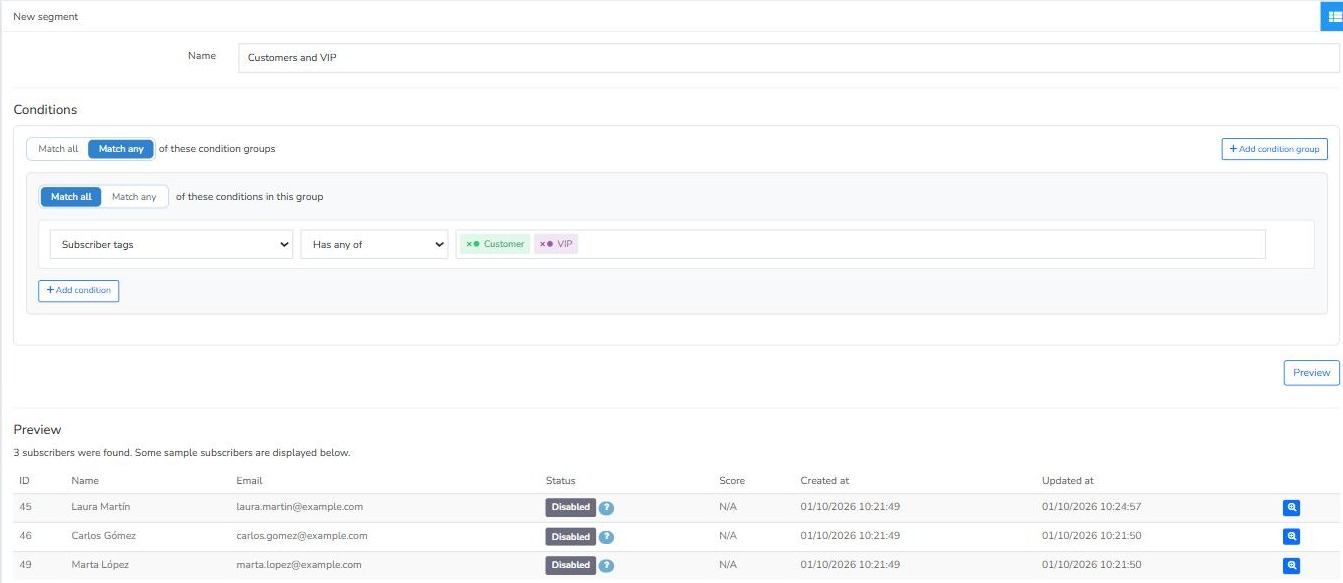
You can combine this condition with others, such as country or opens. See the segmentation article to learn how Match all and Match any work.
6. Frequently asked questions about tags
Can a subscriber have several tags?
Yes. You can assign as many tags as you need to the same contact, for example Customer and VIP.
Can I remove a tag from many subscribers at once?
Yes. Select them in the subscribers list and use Mass edit > Remove tags.
Can I send a newsletter only to subscribers with a specific tag?
Yes. Create a segment with the Subscriber tags condition and select it as the recipient when you create the newsletter.
When should I use a tag and when a group?
Use groups to organize your lists (for example, by type of newsletter) and tags to label each contact's situation (for example, which funnel stage they are in). A contact can be in a group and have several tags at the same time.
Was this article helpful?
That’s Great!
Thank you for your feedback
Sorry! We couldn't be helpful
Thank you for your feedback
Feedback sent
We appreciate your effort and will try to fix the article